
How to: Power Steering Relocation


Thread Starter
Junior Member
Joined: Jul 2003
Posts: 5
From: San Antonio, TX
Note: This is my first write up and I hope this is as informative and instructional as I hope it is.
I had wanted to relocate my power steering and all I could find was this thread sorry for it being from the "other" forum) http://www.rx7club.com/showthread.php?t=664495
And it's a bit of a pain to locate a 84-85 P/S bracket and it's even more of a pain to work with the cast iron.
I had my bracket off from removing my A/C and started looking at it. I figured out I could modify the stock bracket a bit to work on the lower position on the motor and aluminum is alot easier to work with than cast iron.
Tools:
Grinder/cutoff wheel
Hacksaw
Drill
Visegrips (to remove stud)
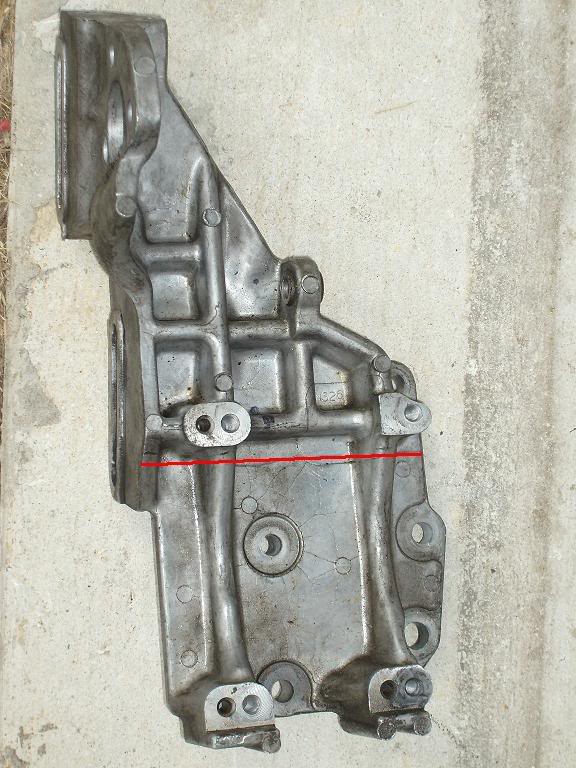
1. This is the line where I decided to cut the bracket in half.
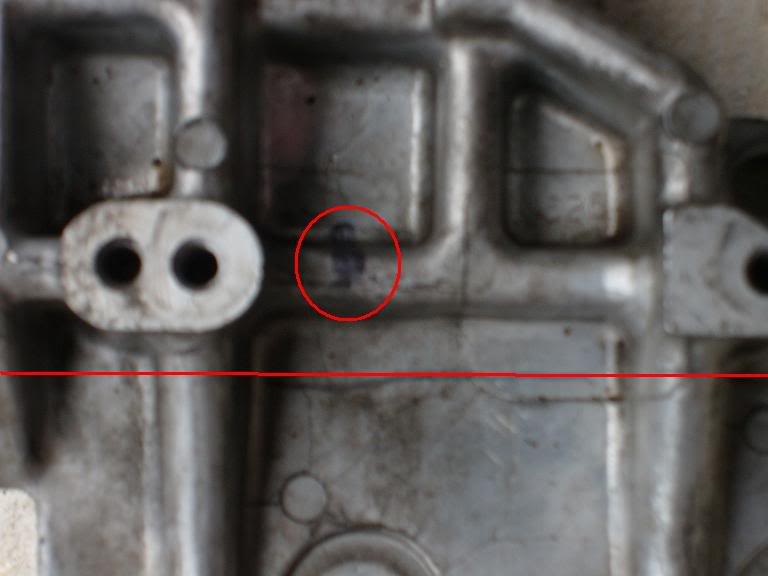
2. And here you can see the line again and the point where I marked to drill out. I chose this spot to make the two bottom holes on the stock bracket esentially moved to the upper part.
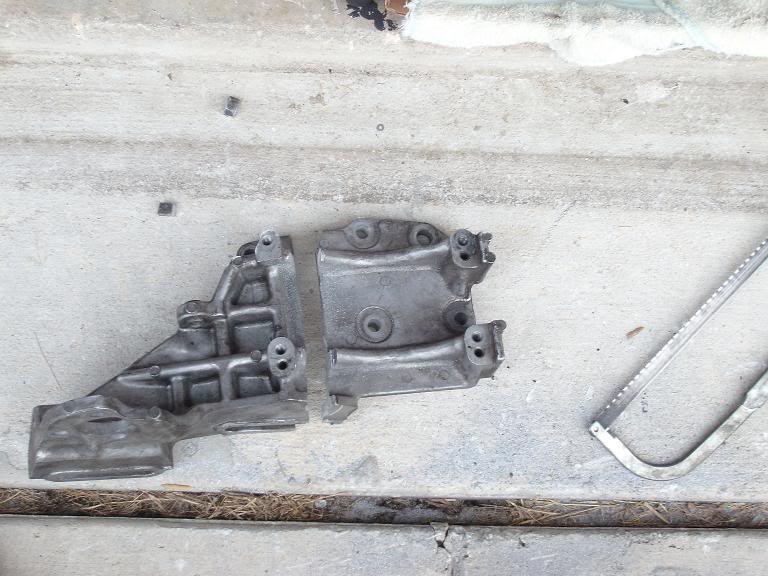
3. Cut in half.
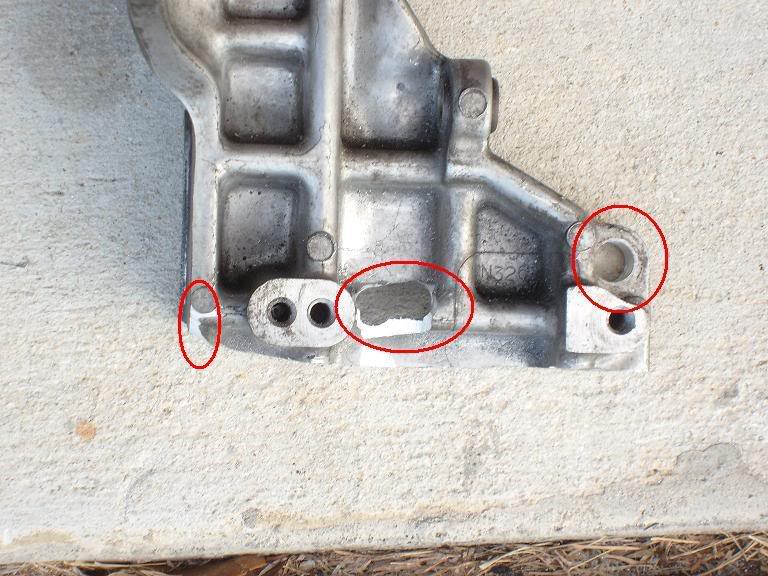
4. (From left to right)
a.I had to grind here to clear the stock oil cooler lines,
b.My first hole was a little to the right and corrected to the left.
c.The hole I enlarged to accept the larger stud on the engine.
5. I had mounted the bracket and realized I forgot to check the angle of the bracket (so the pulleys are all straight and aligned with the main) before I drilled the first two holes. I drilled the new one and filled in the rest with JB weld putty to return some more structural integrity (Note: It did hold fine even with the larger hole, I was just being careful.

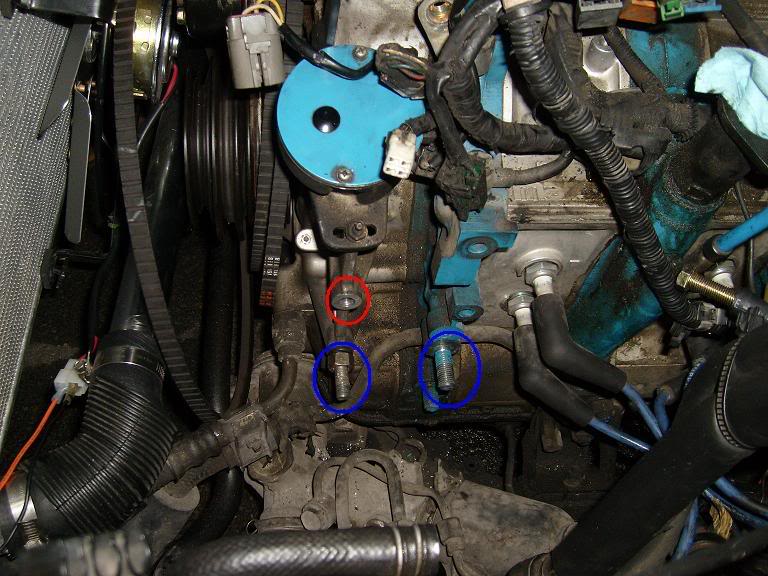
6. Red: There is a threaded stud that has to be removed to allow the bracket to fully sit.
Blue (L): I added a washer and larger nut to allow this side to sit flush across the two bolts.
Blue �: This is just the right side stud.
I'll be glad to field any questions or criticism.
I had wanted to relocate my power steering and all I could find was this thread
sorry for it being from the "other" forum) http://www.rx7club.com/showthread.php?t=664495And it's a bit of a pain to locate a 84-85 P/S bracket and it's even more of a pain to work with the cast iron.
I had my bracket off from removing my A/C and started looking at it. I figured out I could modify the stock bracket a bit to work on the lower position on the motor and aluminum is alot easier to work with than cast iron.
Tools:
Grinder/cutoff wheel
Hacksaw
Drill
Visegrips (to remove stud)
1. This is the line where I decided to cut the bracket in half.
2. And here you can see the line again and the point where I marked to drill out. I chose this spot to make the two bottom holes on the stock bracket esentially moved to the upper part.
3. Cut in half.
4. (From left to right)
a.I had to grind here to clear the stock oil cooler lines,
b.My first hole was a little to the right and corrected to the left.
c.The hole I enlarged to accept the larger stud on the engine.
5. I had mounted the bracket and realized I forgot to check the angle of the bracket (so the pulleys are all straight and aligned with the main) before I drilled the first two holes. I drilled the new one and filled in the rest with JB weld putty to return some more structural integrity (Note: It did hold fine even with the larger hole, I was just being careful.
6. Red: There is a threaded stud that has to be removed to allow the bracket to fully sit.
Blue (L): I added a washer and larger nut to allow this side to sit flush across the two bolts.
Blue �: This is just the right side stud.
I'll be glad to field any questions or criticism.

Thread Starter
Junior Member
Joined: Jul 2003
Posts: 5
From: San Antonio, TX
And here are some pictures of how low it sits with everything in. Before I put it in, I went ahead and replaced the JB weld with a plug of aluminum I made from the leftover bracket piece.
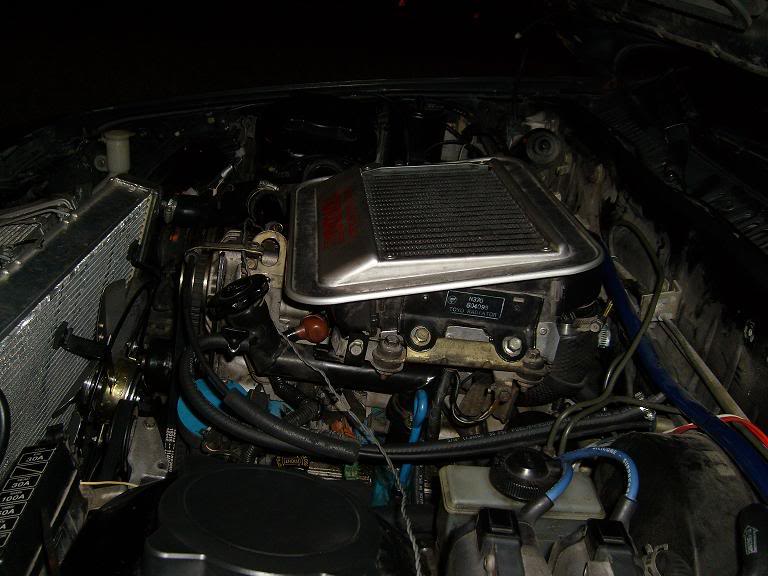
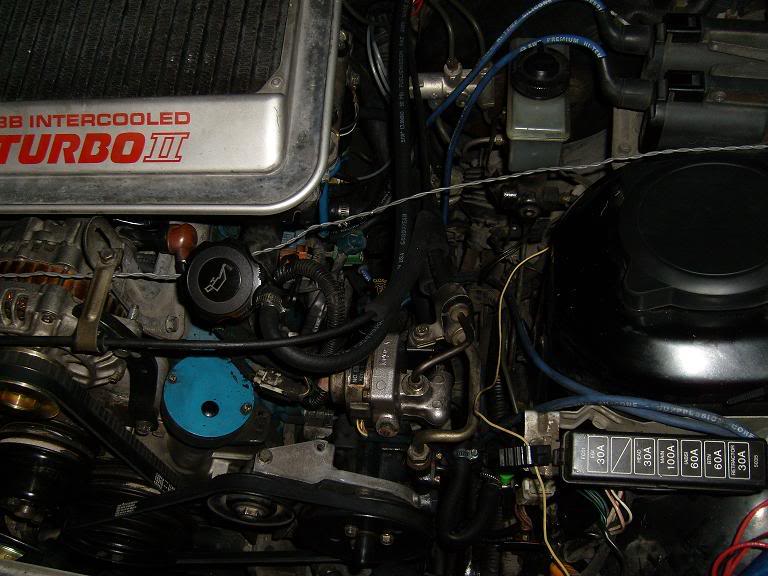
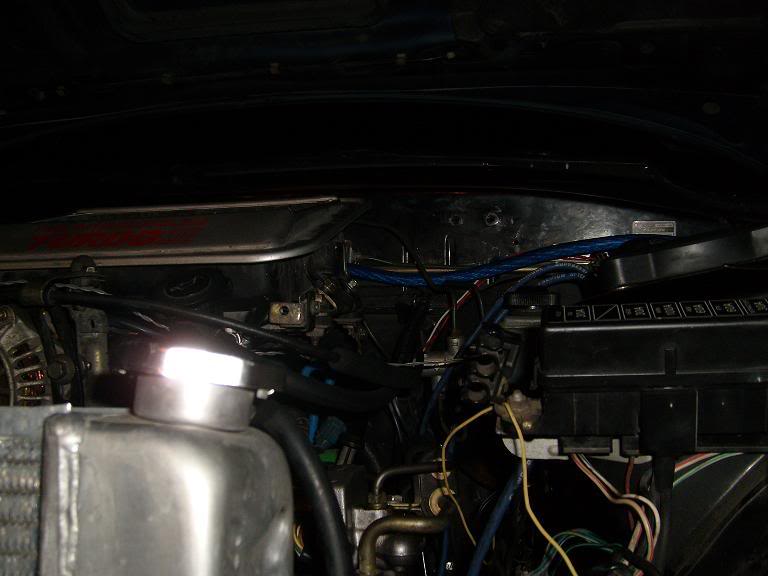
BTW, I was doing this so I can have room for the piping I'm running for my v-mount....I just need to buy some piping first.
BTW, I was doing this so I can have room for the piping I'm running for my v-mount....I just need to buy some piping first.

Junior Member
Joined: Jul 2009
Posts: 7
Originally Posted by DragonRx7' post='888297' date='Nov 19 2007, 06:46 PM
And here are some pictures of how low it sits with everything in. Before I put it in, I went ahead and replaced the JB weld with a plug of aluminum I made from the leftover bracket piece.


BTW, I was doing this so I can have room for the piping I'm running for my v-mount....I just need to buy some piping first.
BTW, I was doing this so I can have room for the piping I'm running for my v-mount....I just need to buy some piping first.
do u use oem length belts or do u have to get a certain length?

Thread
Thread Starter
Forum
Replies
Last Post
zenki.fc
RX-7 & RX-8 Parts For Sale & Wanted
2
Jul 29, 2014 02:13 PM
Currently Active Users Viewing This Thread: 1 (0 members and 1 guests)

