Rotary Engine Building, Porting & Swaps All you could ever want to know about rebuilding and porting your rotary engine! Discussions also on Water, Alcohol, Etc. Injection

4 Rotor Build in Sweden

Thread Tools
 
Search this Thread
 
Old Oct 27, 2010 | 03:36 PM
  #1  
Tegheim's Avatar
Thread Starter
Senior Member
 
Joined: Sep 2003
Posts: 229
Talking

Hi, where unsure if I should post a project thread, but friends pushed me


I'm trying to build a car the way I want.

The car is an Volvo 142 -73. They are rather common i Sweden, but all of them are piston-engineed.

It started with a simple 4-link-build. But now it all has got out of hands...


I will post as much pictures as possible, but there is alot old pictures so I also link my older swedish project-thread so you all can se my progress-pictures.


I let the pictures talk for them self at first. Visit my album at Photobucket, to much to upload!

All work is done by myself.


Right now I'm all hands with the 4rotor-build from my own CADs and handwork.

Everything is made in house.


http://s815.photobucket.com/albums/z...20Wolvo%20142/


Have problem to post images?! How many pictures can I have in every post??


A teaser...


Best Regards

Tegheim - Mooseville Performance
Old Oct 27, 2010 | 06:11 PM
  #2  
phinsup's Avatar
Administrator
 
Joined: Jul 2001
Posts: 24,416
From: Stuart, FL
Default

you can post as many images as you want.


Awesome project man, looks like it's going to amazing!
Old Oct 27, 2010 | 11:19 PM
  #3  
Tegheim's Avatar
Thread Starter
Senior Member
 
Joined: Sep 2003
Posts: 229
Default

Had problems yesterday with posting pictures in the first message. The warning "too many pics...." came up al the time...


So, about the project. This is old pictures. Started on this build in the spring 2010. Have had a little summer-break, and are back on track.

But will put up som older pictures first, so you all ca follow it in the right way


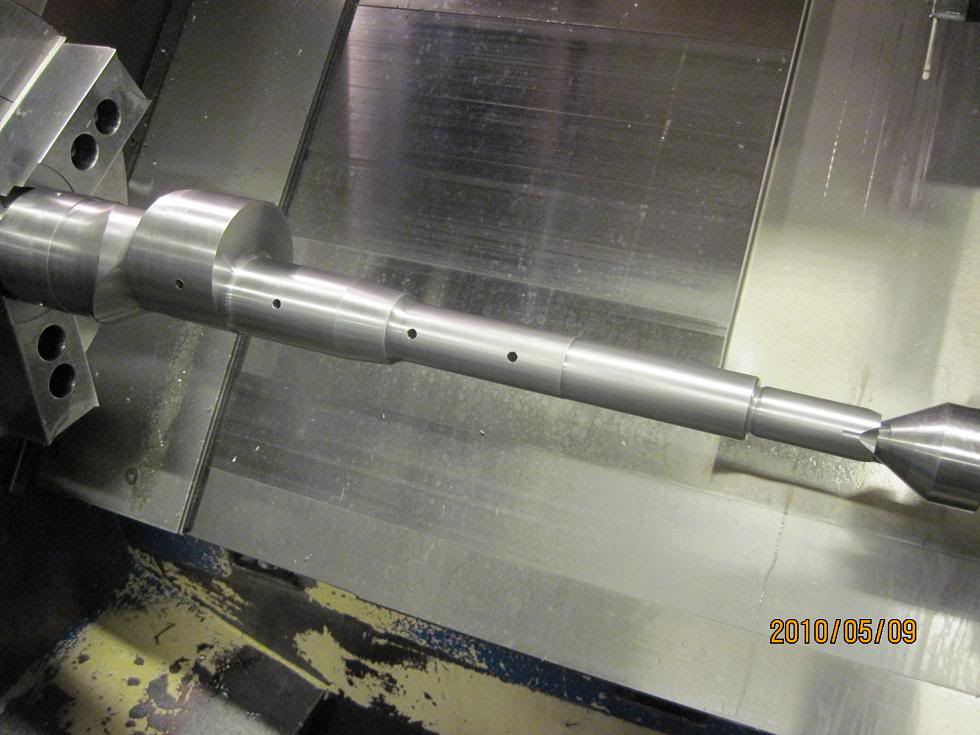
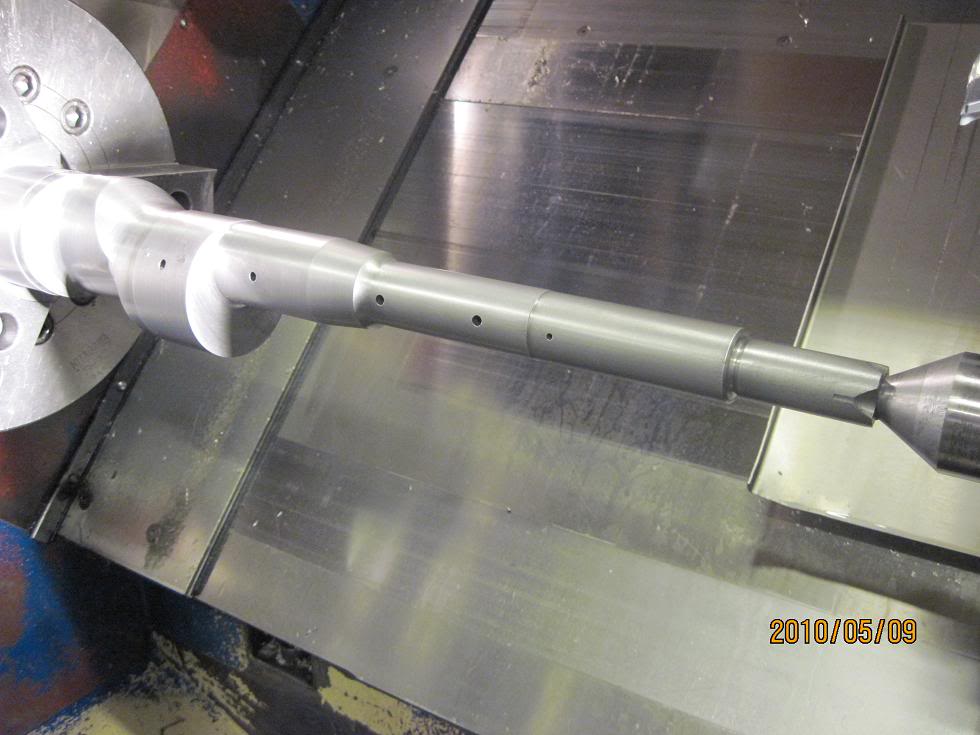
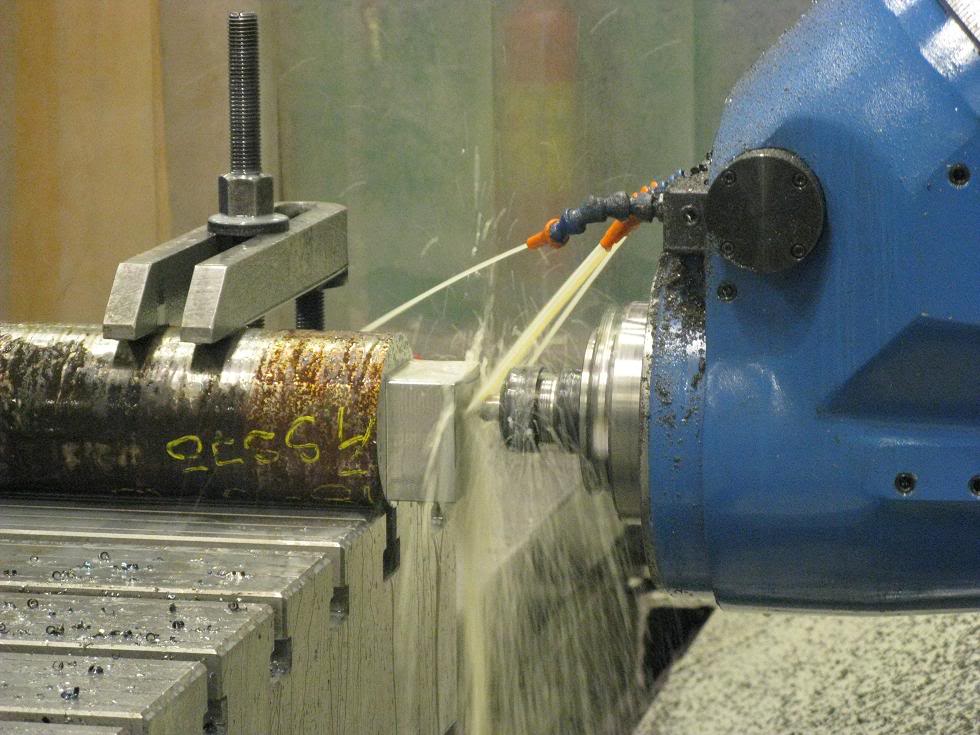
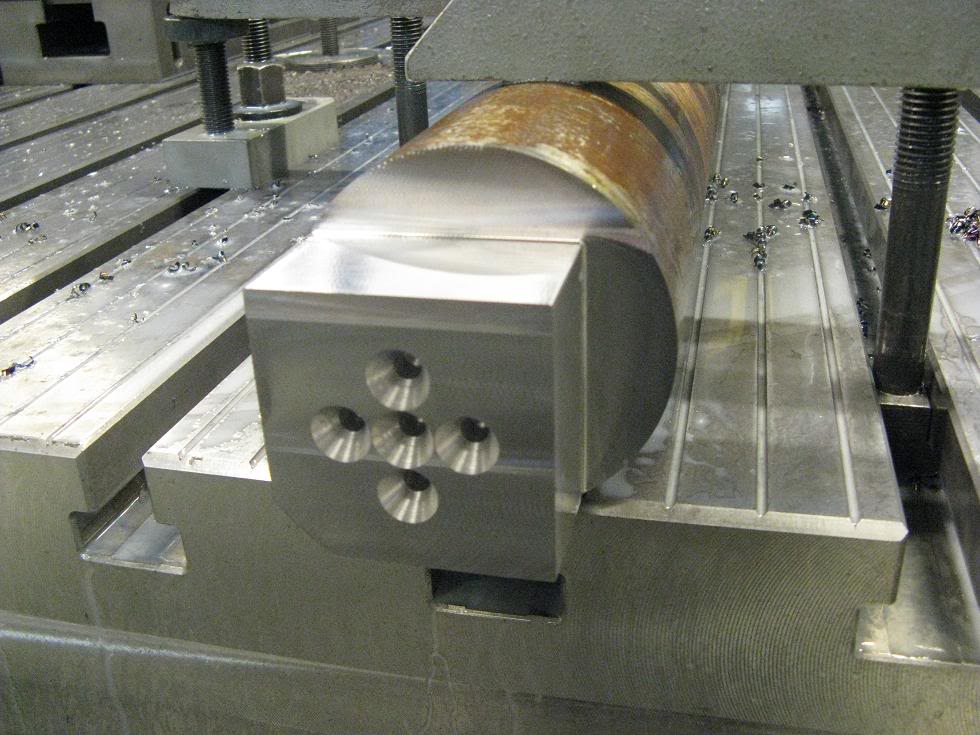
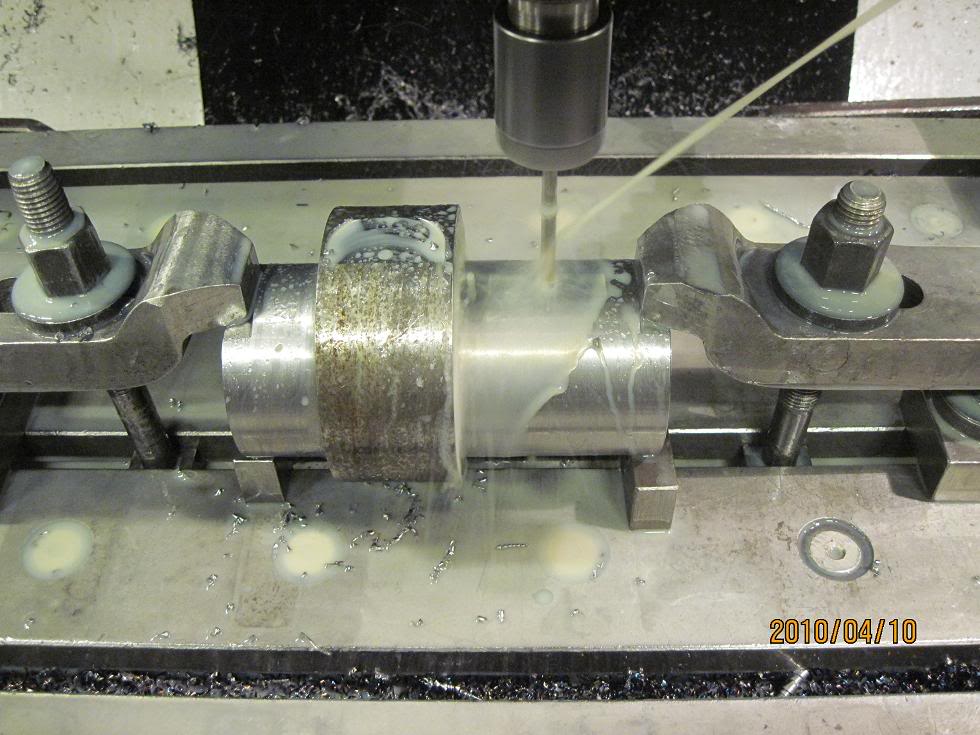
More 4rotor build...


Name:  Wolvo142-26B-2010-03-25003-30.jpg
Views: 3482
Size:  136.1 KB

Name:  Wolvo142-26B-2010-03-25004-30.jpg
Views: 3390
Size:  112.7 KB

Name:  Wolvo142-26B-2010-03-25010-30.jpg
Views: 3475
Size:  108.6 KB

Name:  Wolvo142-26B-2010-03-25006-30.jpg
Views: 3444
Size:  106.4 KB

Name:  Wolvo142-26B-2010-03-25011-30.jpg
Views: 3431
Size:  128.7 KB

Name:  Wolvo142-26B-2010-03-26002-30.jpg
Views: 3406
Size:  112.4 KB
Old Oct 27, 2010 | 11:20 PM
  #4  
Tegheim's Avatar
Thread Starter
Senior Member
 
Joined: Sep 2003
Posts: 229
Default

Some more, these pictures are taken march 2010.


Name:  Wolvo142-26B-2010-03-27001-30.jpg
Views: 3391
Size:  117.5 KB

Name:  Wolvo142-26B-2010-03-27003-30.jpg
Views: 3430
Size:  118.2 KB

Name:  Wolvo142-26B-2010-03-27005-30.jpg
Views: 3369
Size:  123.6 KB

Name:  Wolvo142-26B-2010-03-27006-30.jpg
Views: 3386
Size:  107.8 KB

Name:  Wolvo142-26B-2010-03-27007-30.jpg
Views: 3377
Size:  90.0 KB

Name:  Wolvo142-26B-2010-03-28001-30.jpg
Views: 3311
Size:  96.6 KB

Name:  Wolvo142-26B-2010-03-28005-30.jpg
Views: 3449
Size:  113.5 KB

Name:  Wolvo142-26B-2010-03-28007-30.jpg
Views: 3344
Size:  89.8 KB

Name:  Wolvo142-26B-2010-03-28006-30.jpg
Views: 3351
Size:  86.6 KB


A little bonus. I'm doing a little air-cooled 10cc rc-engine when I have time over...

And that's not often I'm afraid...

Name:  Wolvo142-26B-2010-03-27004-30.jpg
Views: 4092
Size:  71.4 KB


Regards
Old Oct 27, 2010 | 11:21 PM
  #5  
Tegheim's Avatar
Thread Starter
Senior Member
 
Joined: Sep 2003
Posts: 229
Default

This is how it could look when I'm measure an 20B-shaft


Have only rough-turned the both sides to 46mm, will drill the oil-chanel and so on before I do the fine-cut.

Name:  Wolvo142-26B-2010-04-05002-30.jpg
Views: 3378
Size:  103.8 KB

Name:  Wolvo142-26B-2010-04-05003-30.jpg
Views: 3350
Size:  112.8 KB
Old Oct 27, 2010 | 11:23 PM
  #6  
Tegheim's Avatar
Thread Starter
Senior Member
 
Joined: Sep 2003
Posts: 229
Default

Sorry for the fast rewind


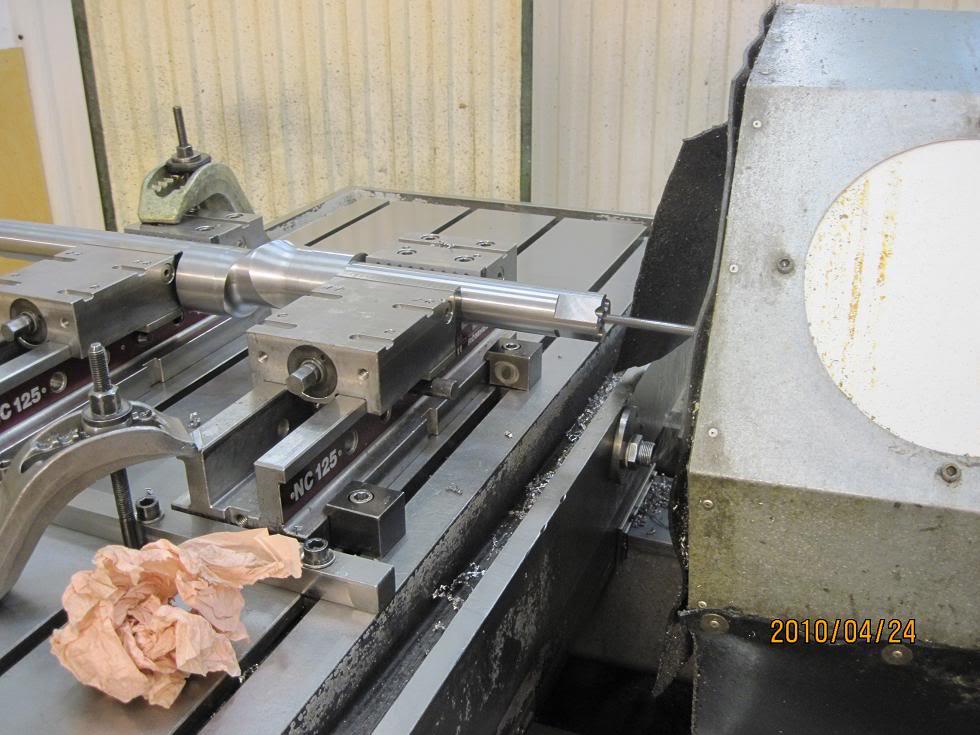
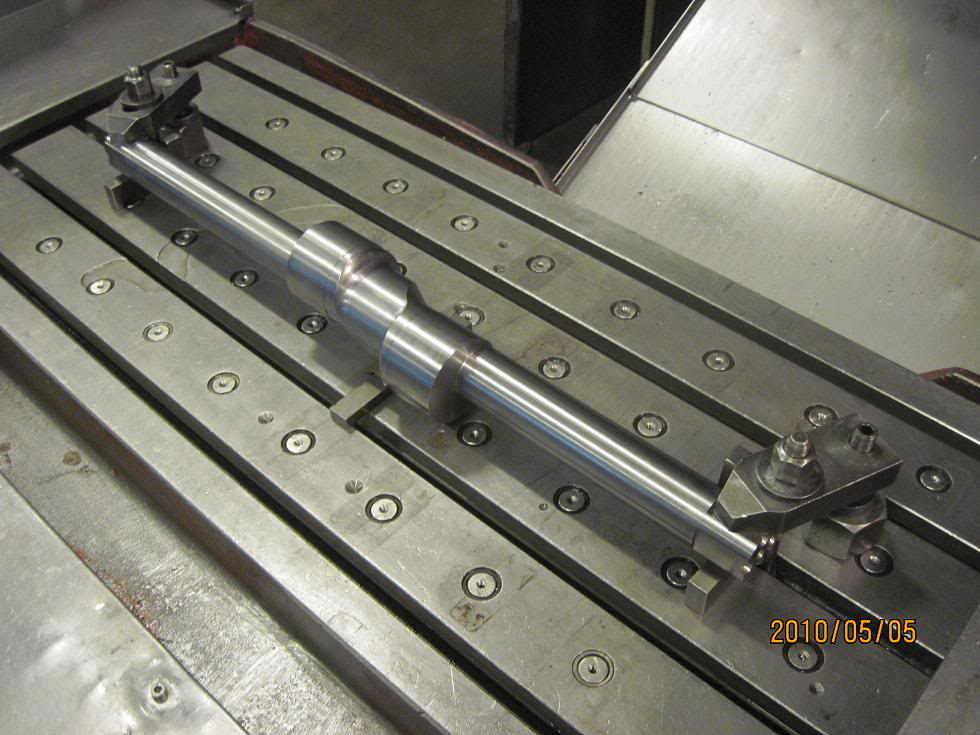
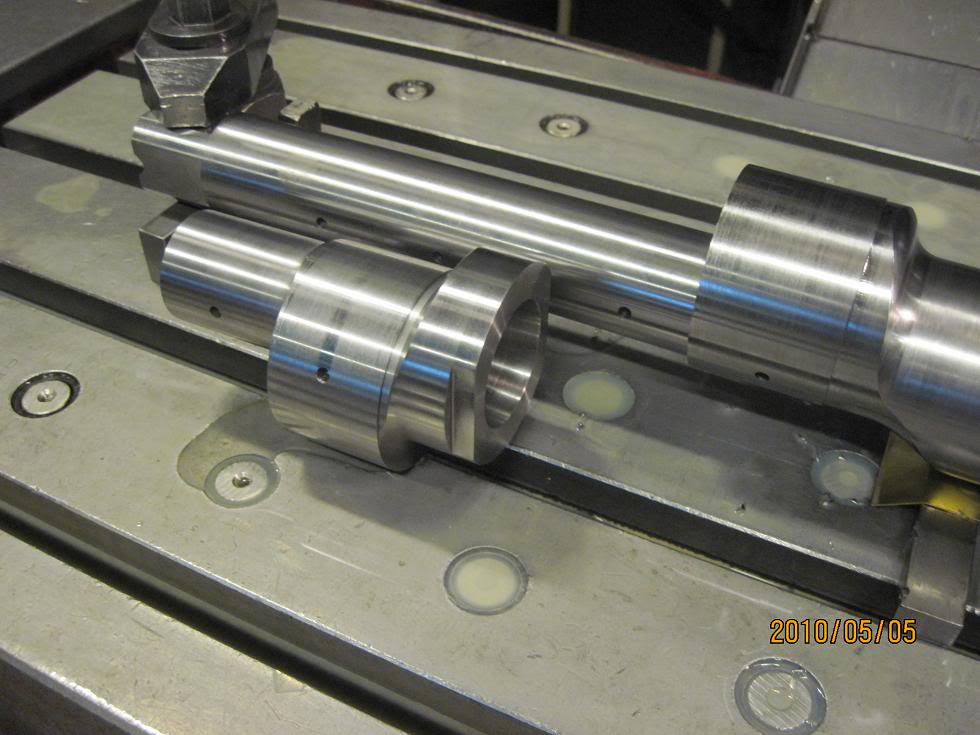
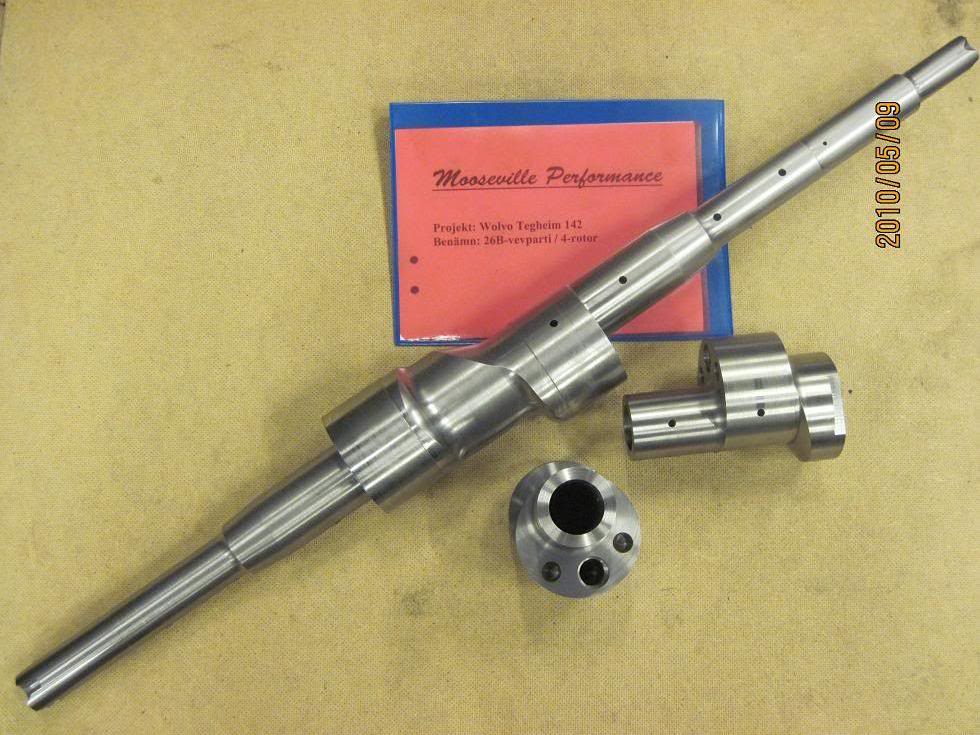
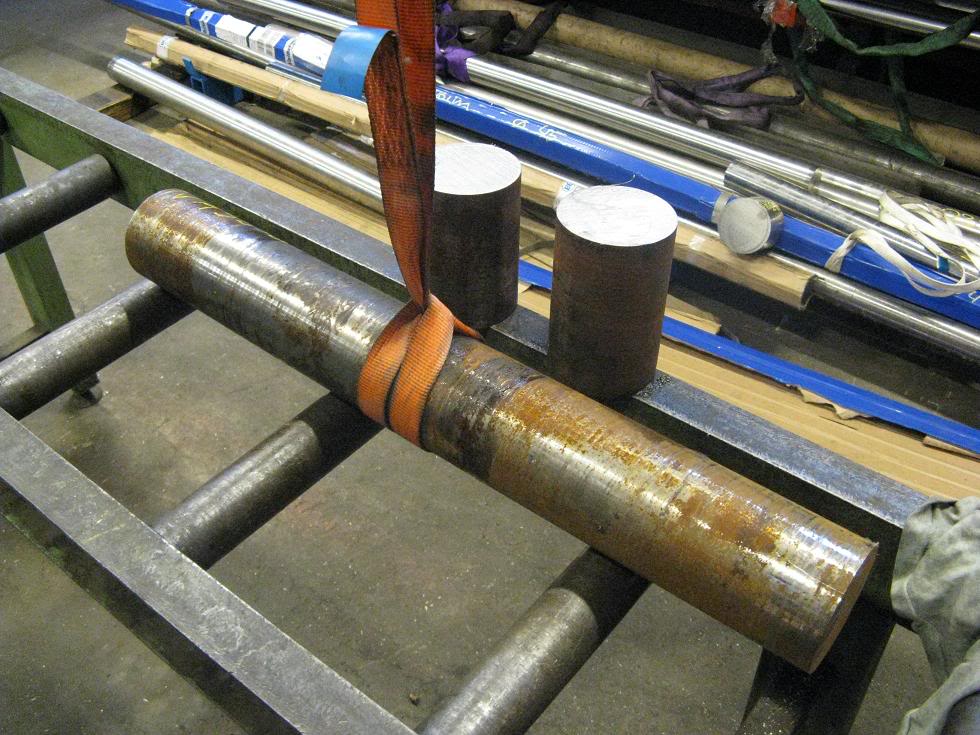
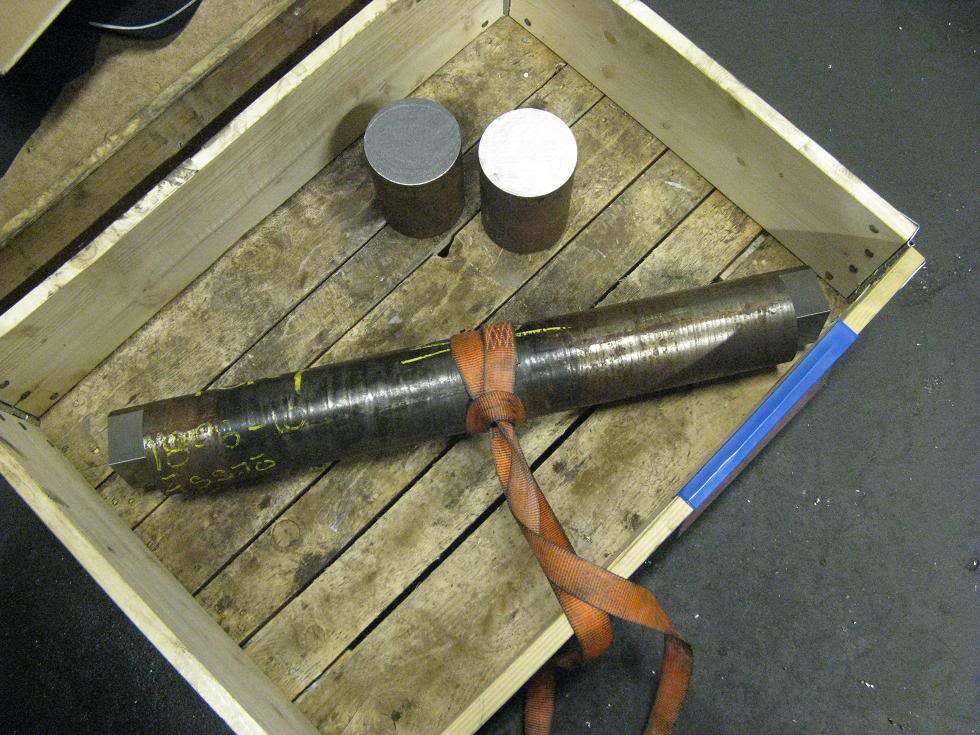
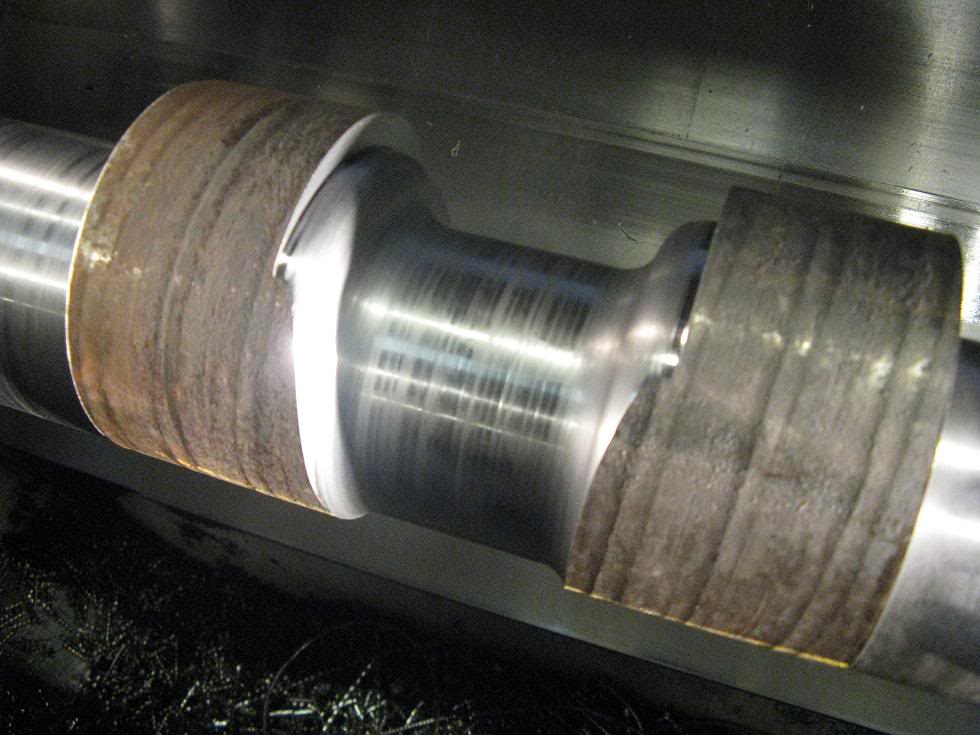
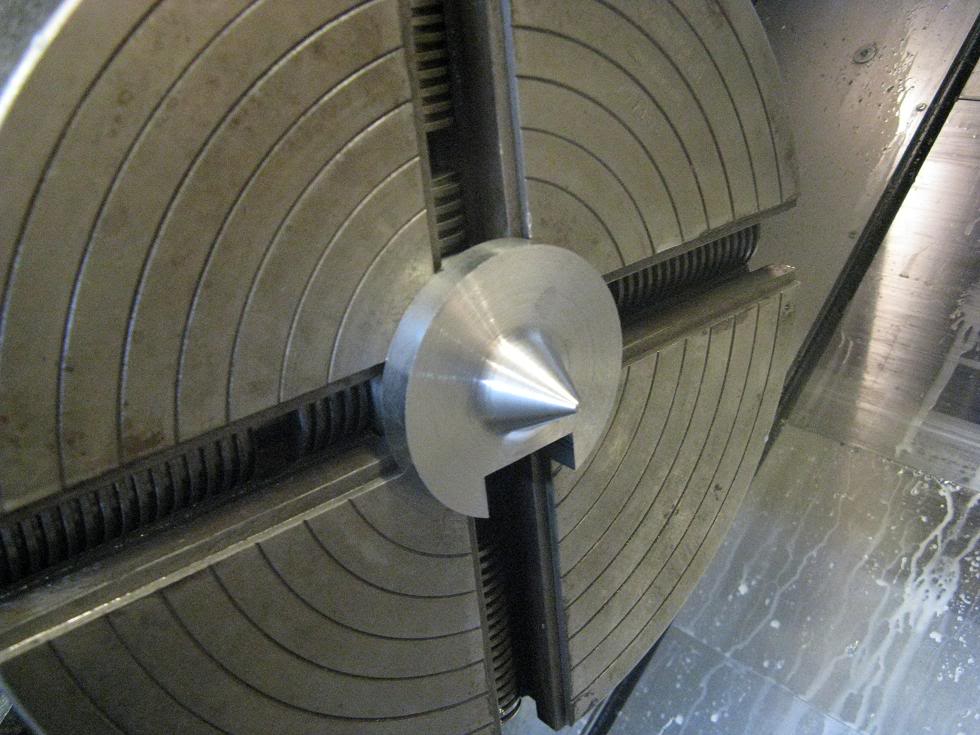
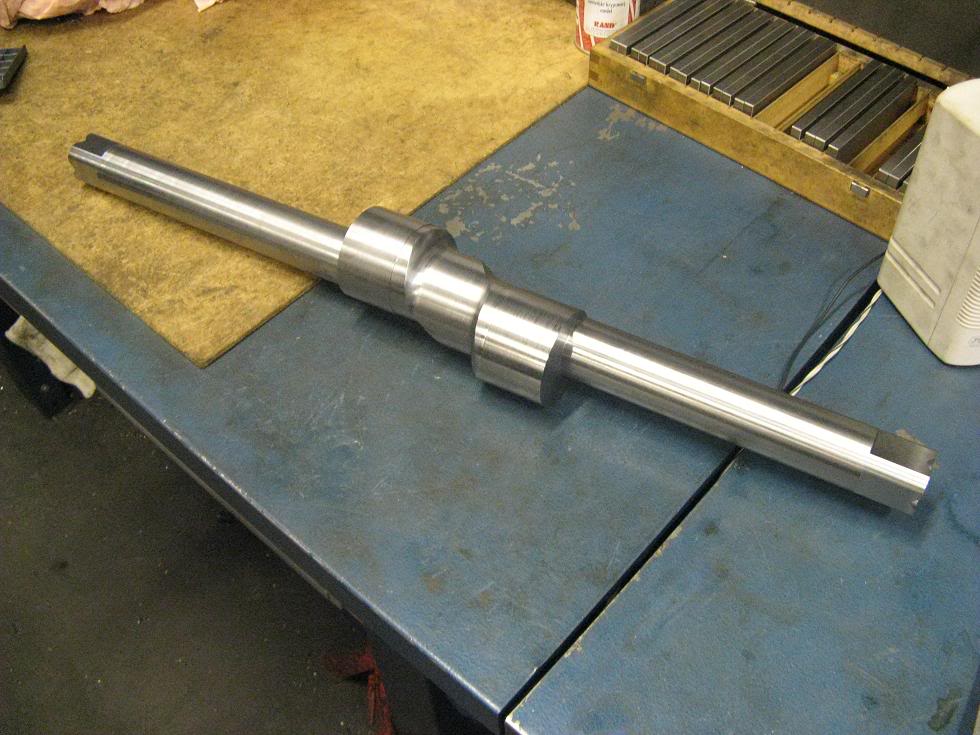
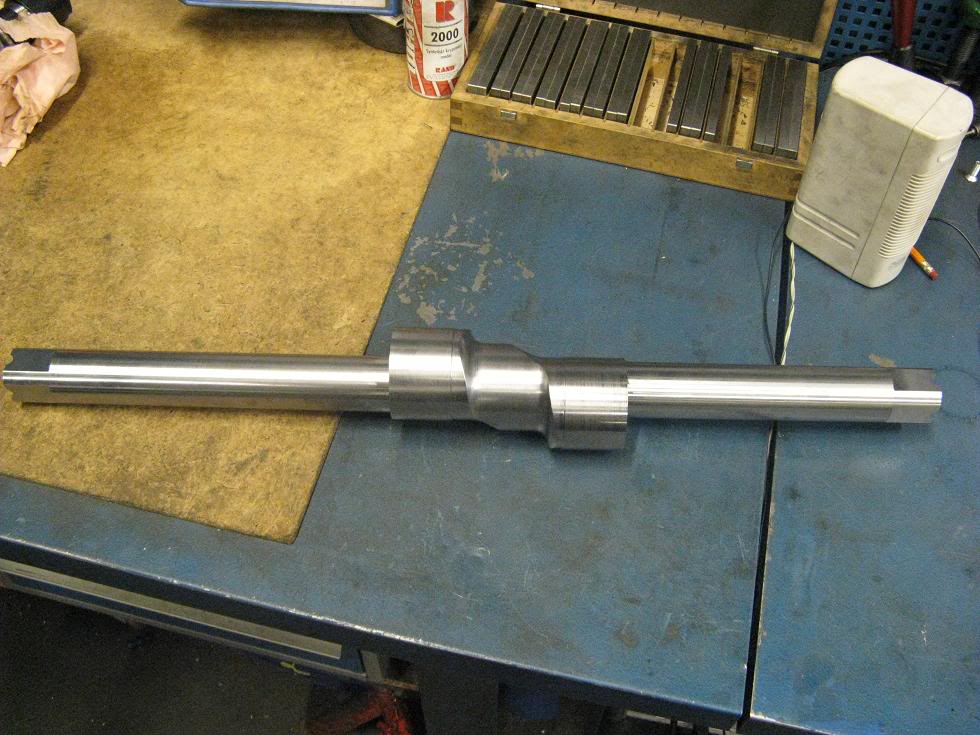
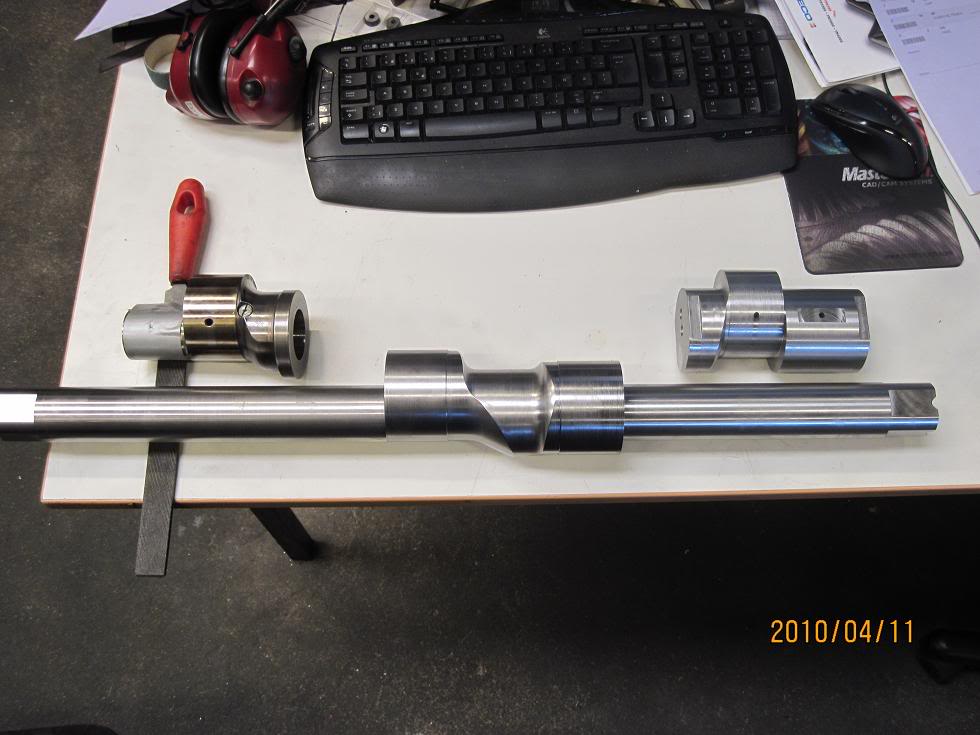
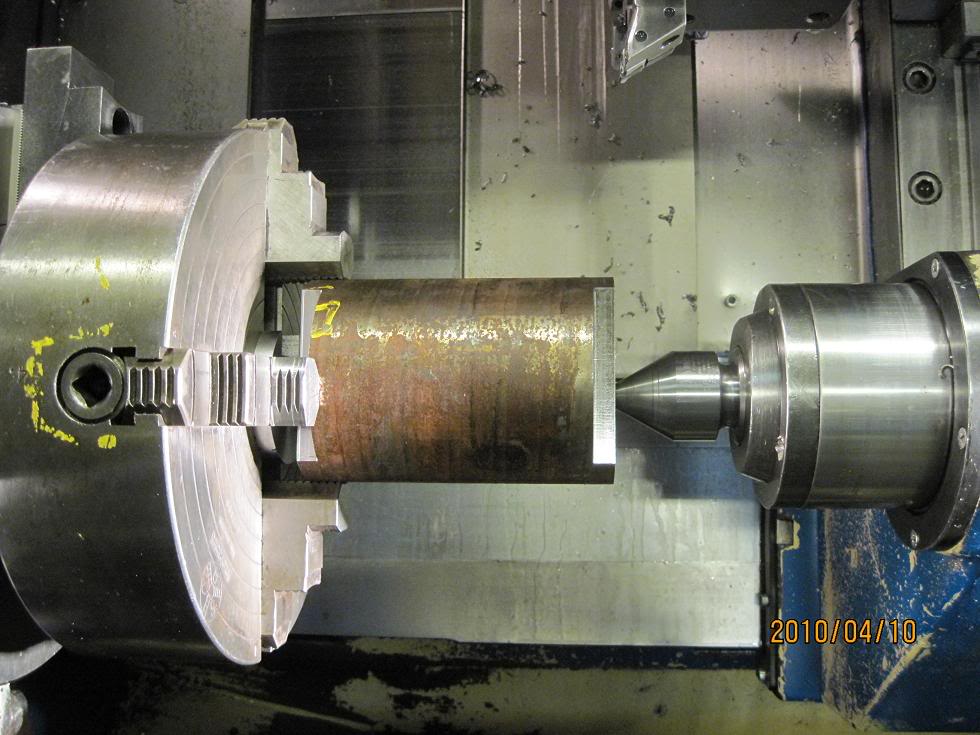
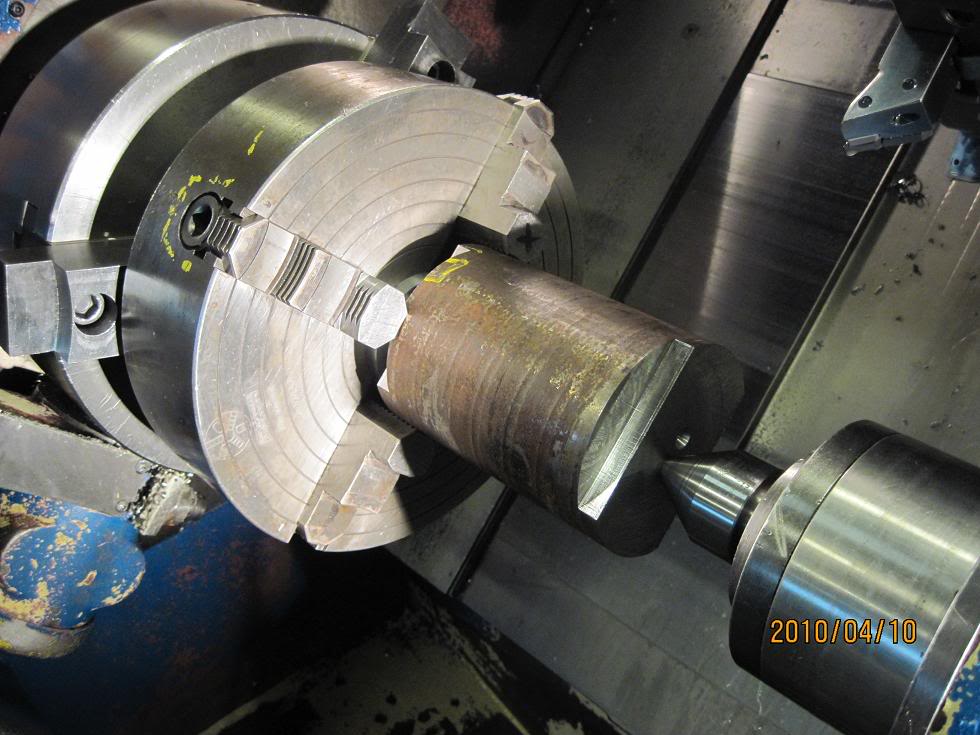
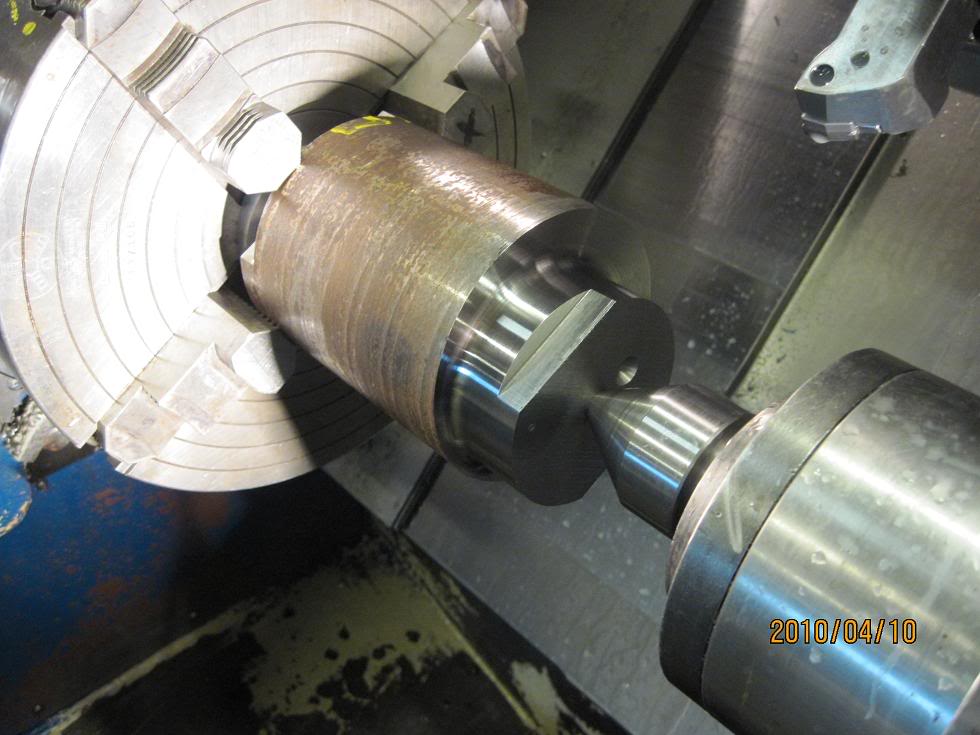
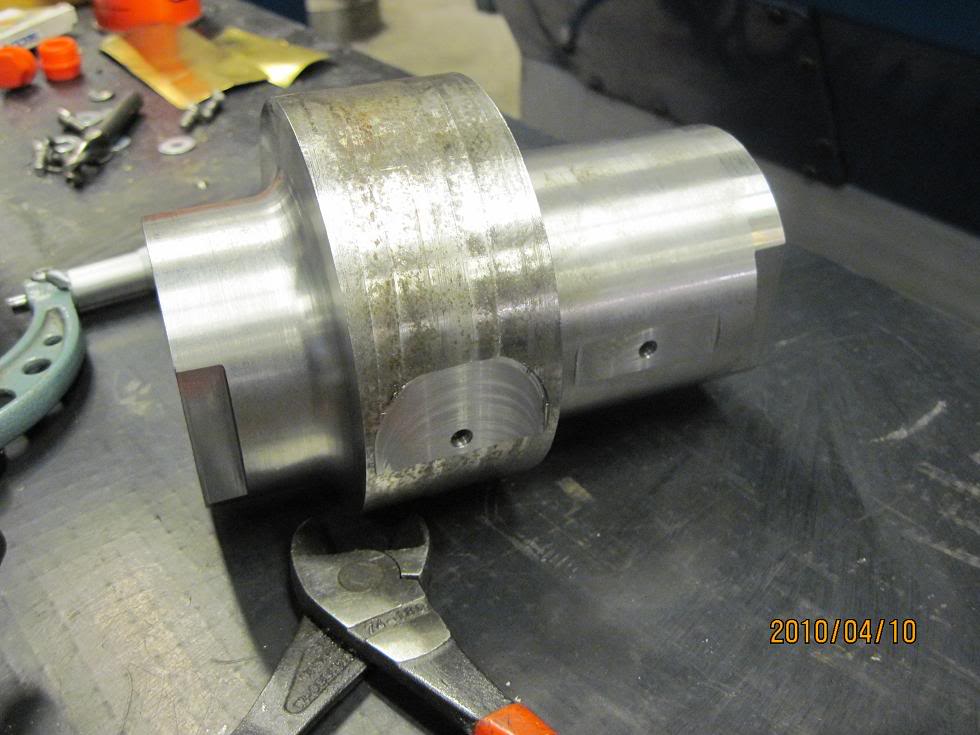
Have started on the two loose ends. And as I did with the main-shaft, I spared a few bucks taking a smaller material, but then I have to turn the centre from an excenter from start. But why not All you can save in money you can have more fun fore


Name:  Wolvo142-26B-2010-04-10002-30.jpg
Views: 3326
Size:  99.5 KB

Name:  Wolvo142-26B-2010-04-10003-30.jpg
Views: 3364
Size:  98.8 KB

Name:  Wolvo142-26B-2010-04-10005-30.jpg
Views: 3363
Size:  83.4 KB

Name:  Wolvo142-26B-2010-04-10008-30.jpg
Views: 3424
Size:  87.0 KB

Name:  Wolvo142-26B-2010-04-10012-30.jpg
Views: 3366
Size:  79.3 KB

Name:  Wolvo142-26B-2010-04-10014-30.jpg
Views: 3324
Size:  105.0 KB

Name:  Wolvo142-26B-2010-04-10015-30.jpg
Views: 3345
Size:  107.8 KB

Name:  Wolvo142-26B-2010-04-10017-30.jpg
Views: 3431
Size:  82.0 KB

Name:  Wolvo142-26B-2010-04-10018-30.jpg
Views: 3351
Size:  75.9 KB
Old Oct 27, 2010 | 11:23 PM
  #7  
Tegheim's Avatar
Thread Starter
Senior Member
 
Joined: Sep 2003
Posts: 229
Default

Name:  Wolvo142-26B-2010-04-11001-30.jpg
Views: 3394
Size:  84.5 KB

Name:  Wolvo142-26B-2010-04-11002-30.jpg
Views: 3321
Size:  69.0 KB

Name:  Wolvo142-26B-2010-04-11003-30.jpg
Views: 3417
Size:  79.7 KB


The entire family is together


Hope you like it!
Old Oct 27, 2010 | 11:27 PM
  #8  
Tegheim's Avatar
Thread Starter
Senior Member
 
Joined: Sep 2003
Posts: 229
Default

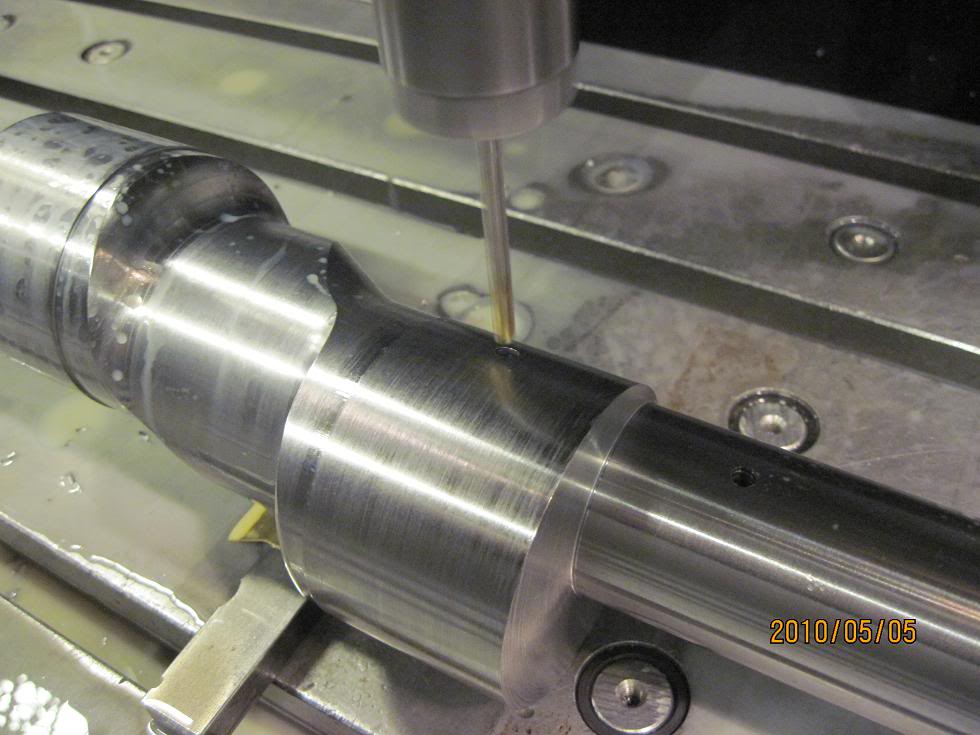
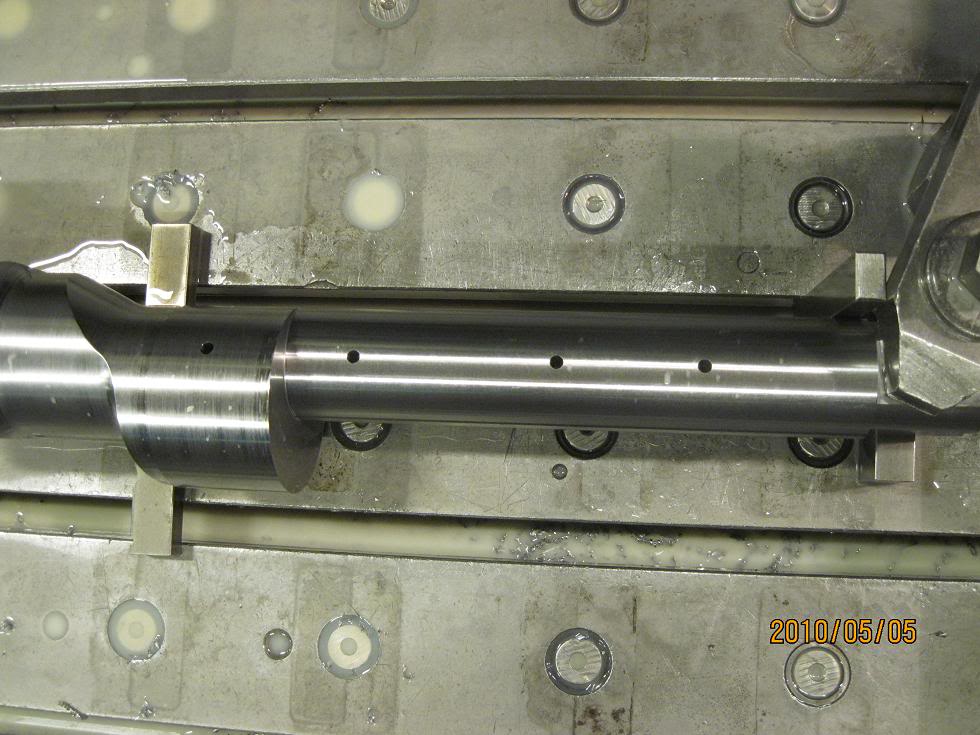
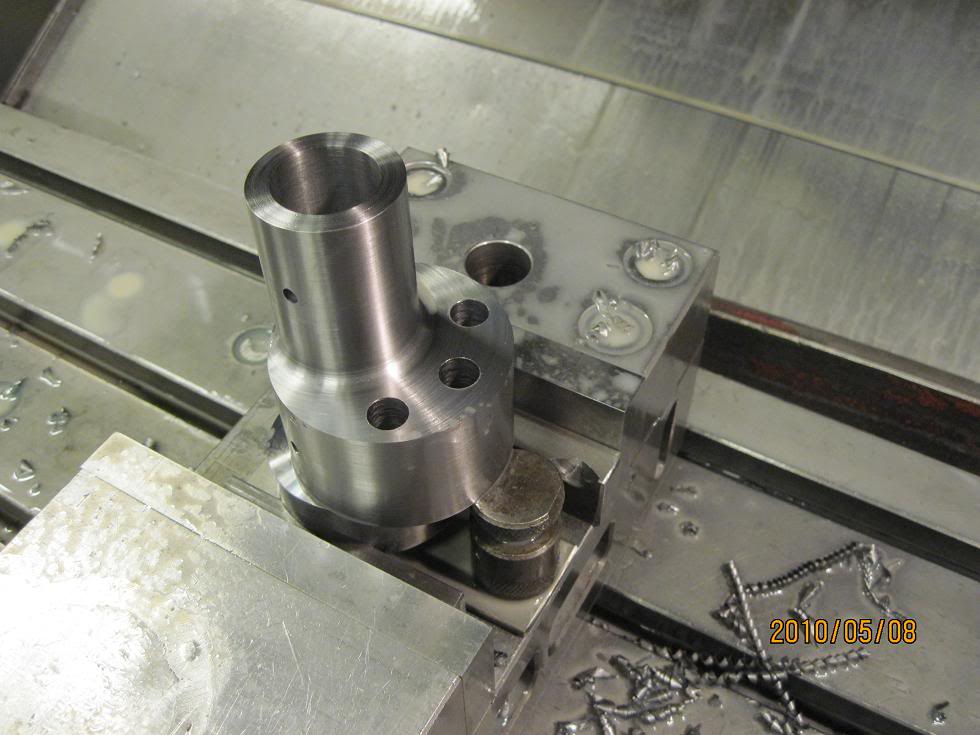
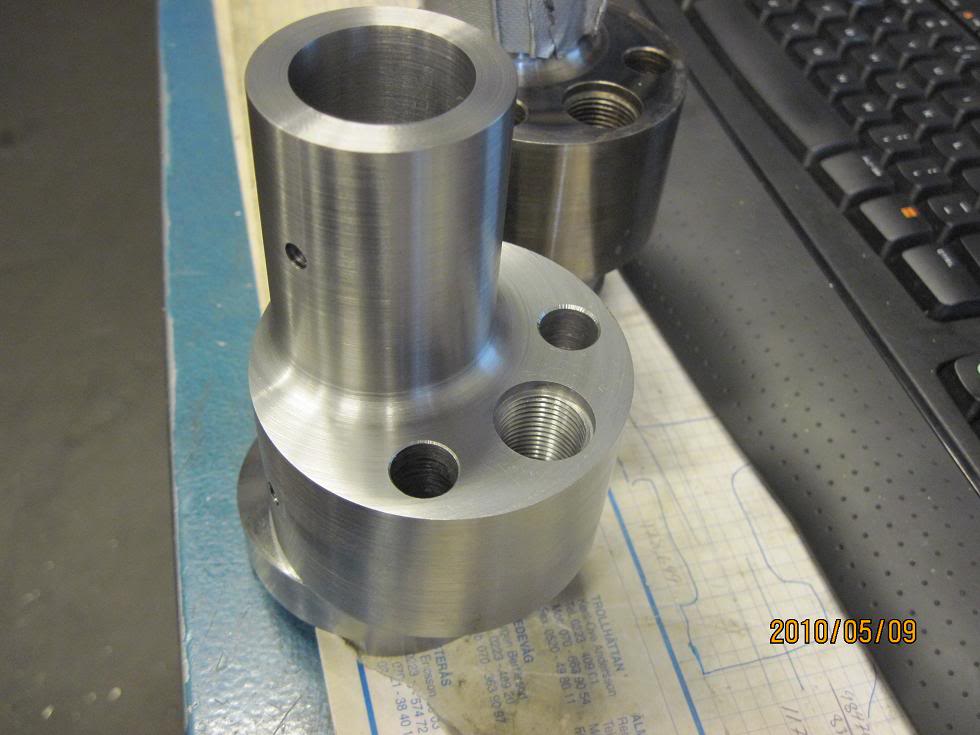
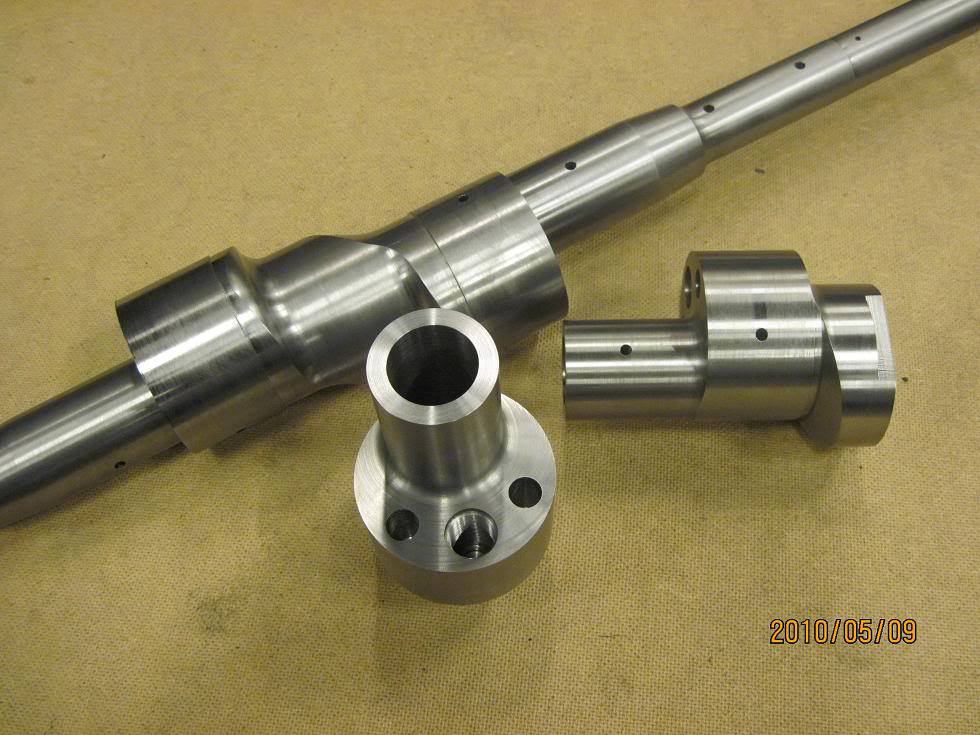
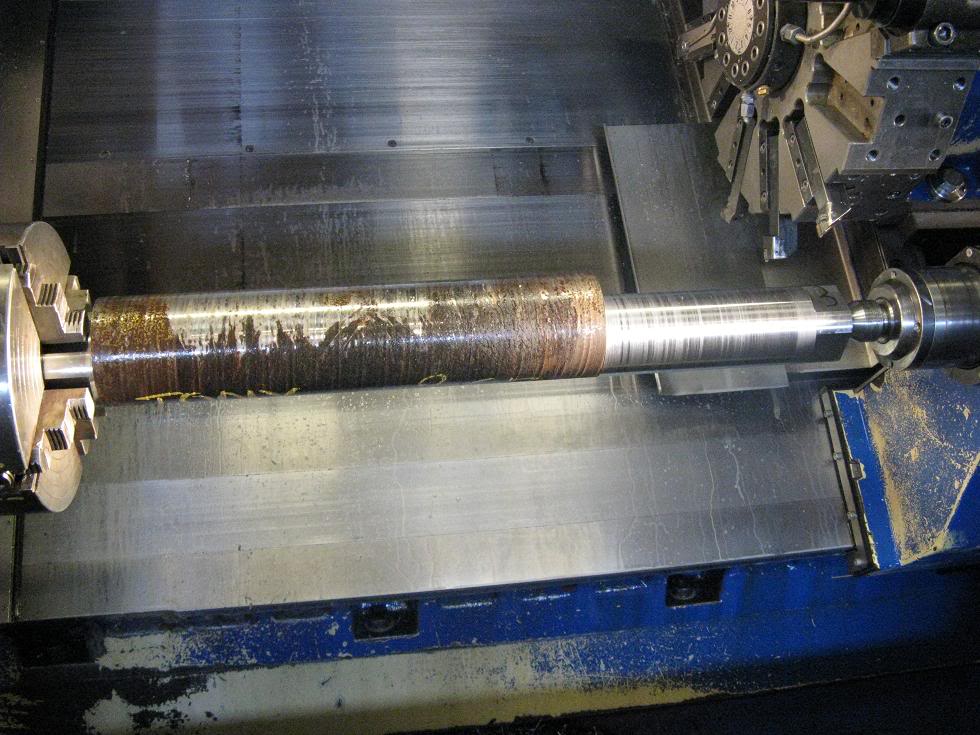
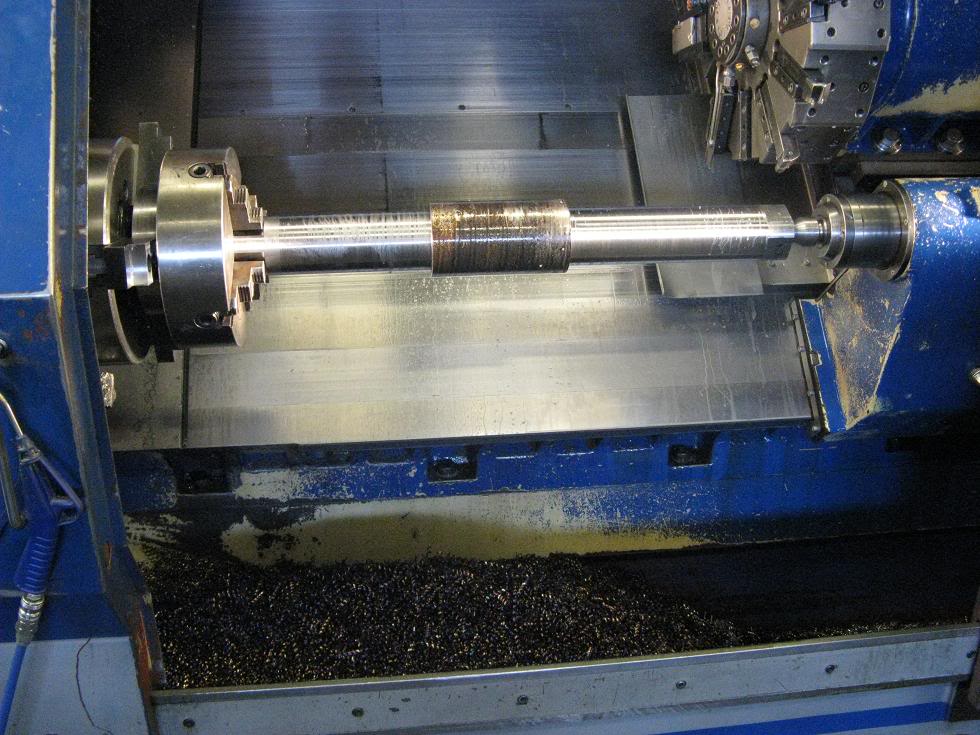
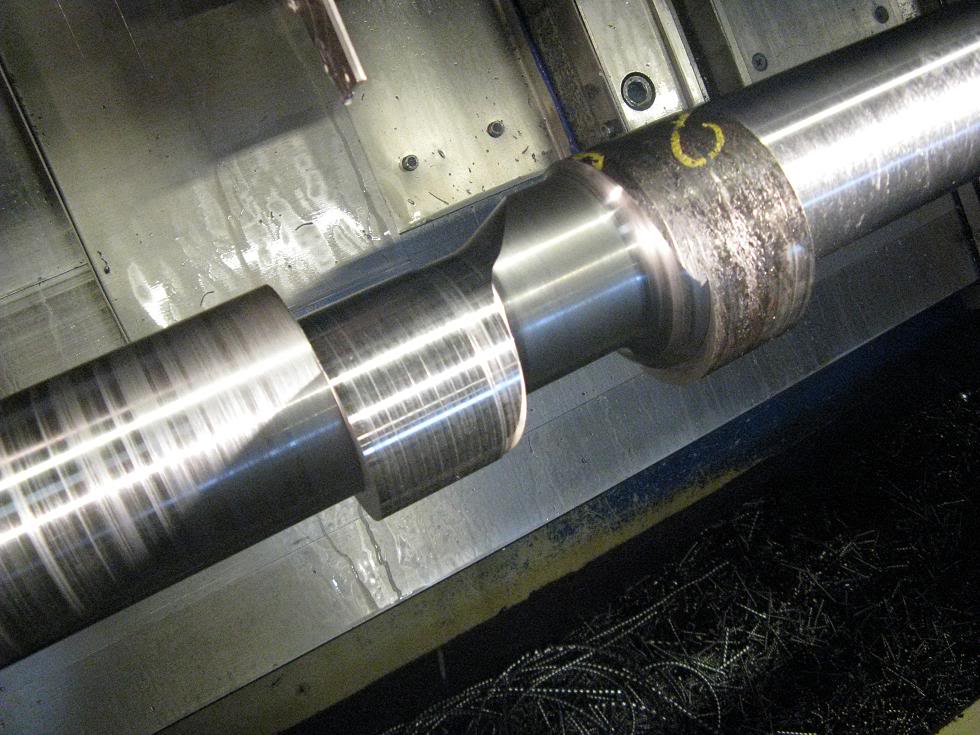
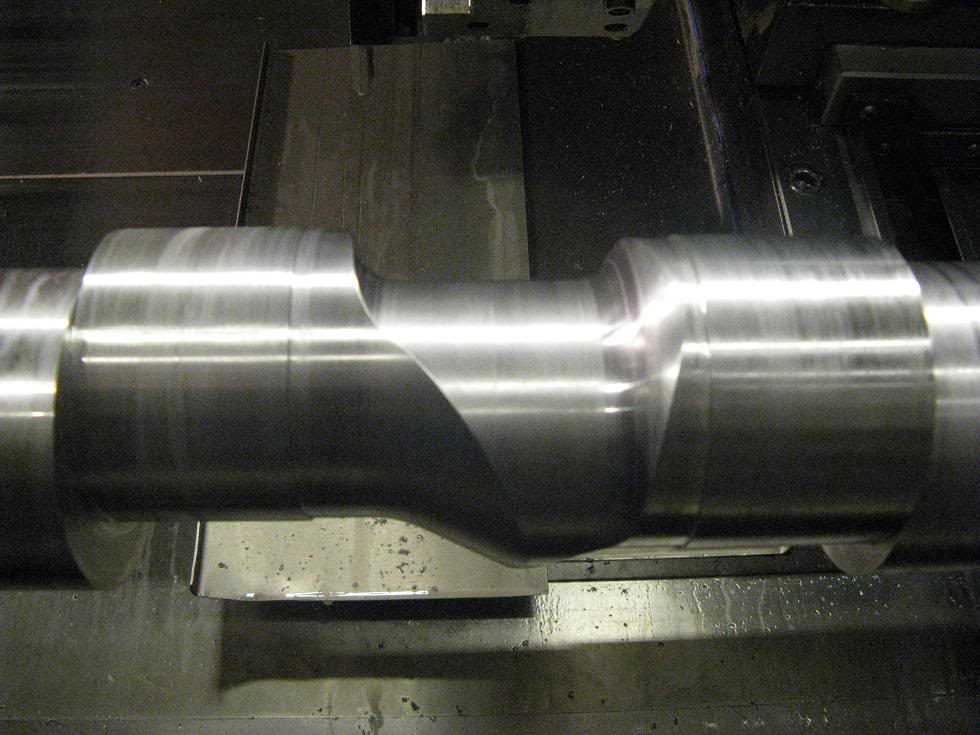
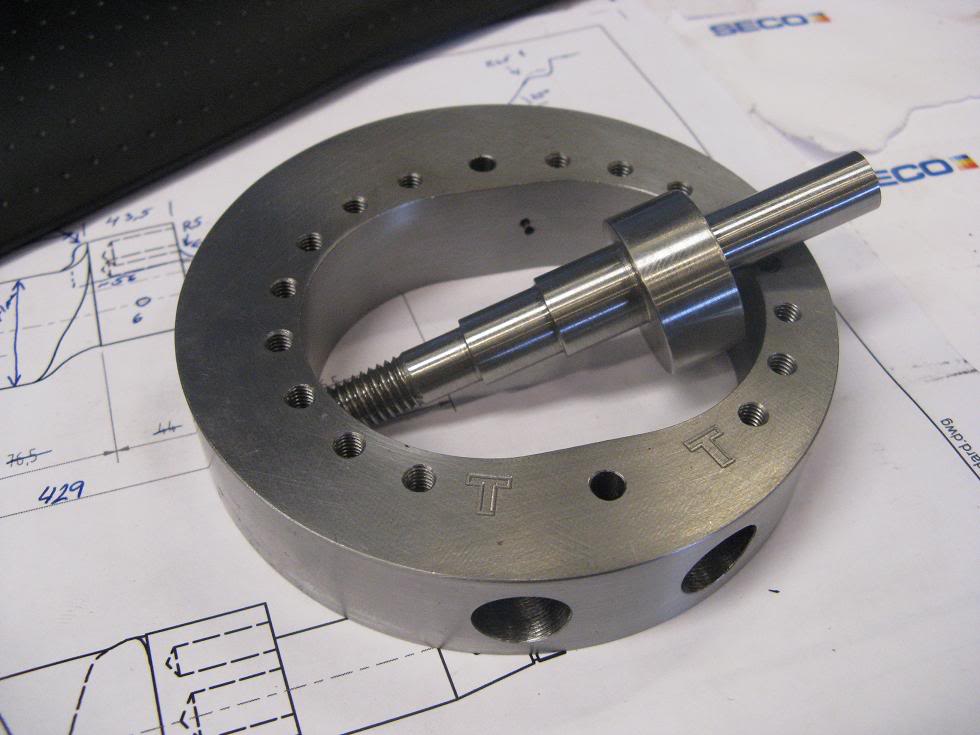
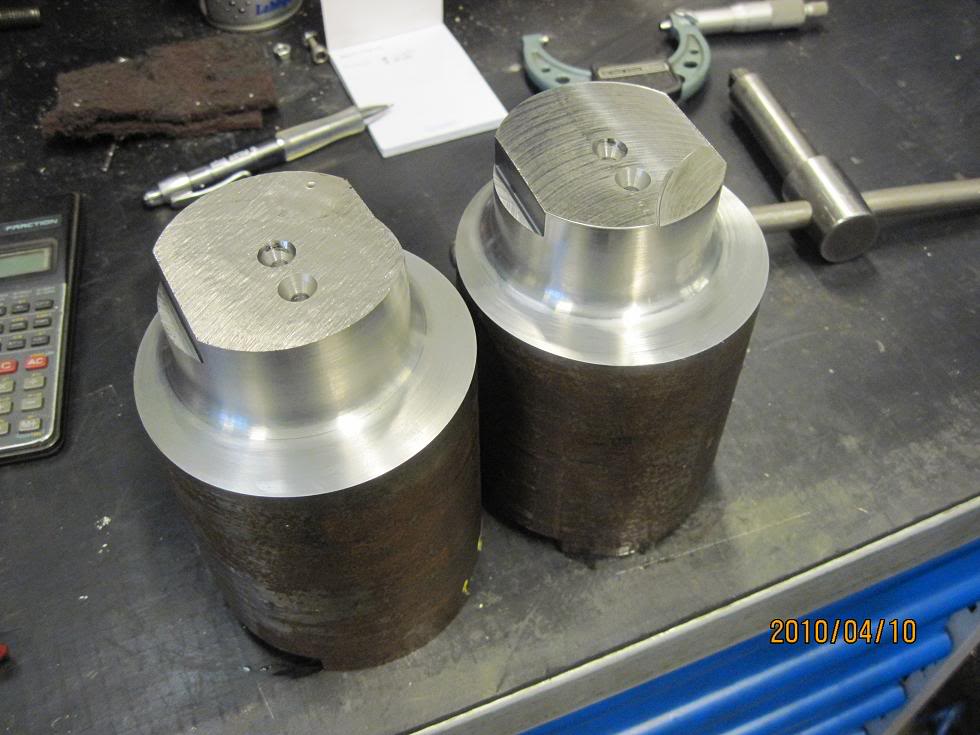
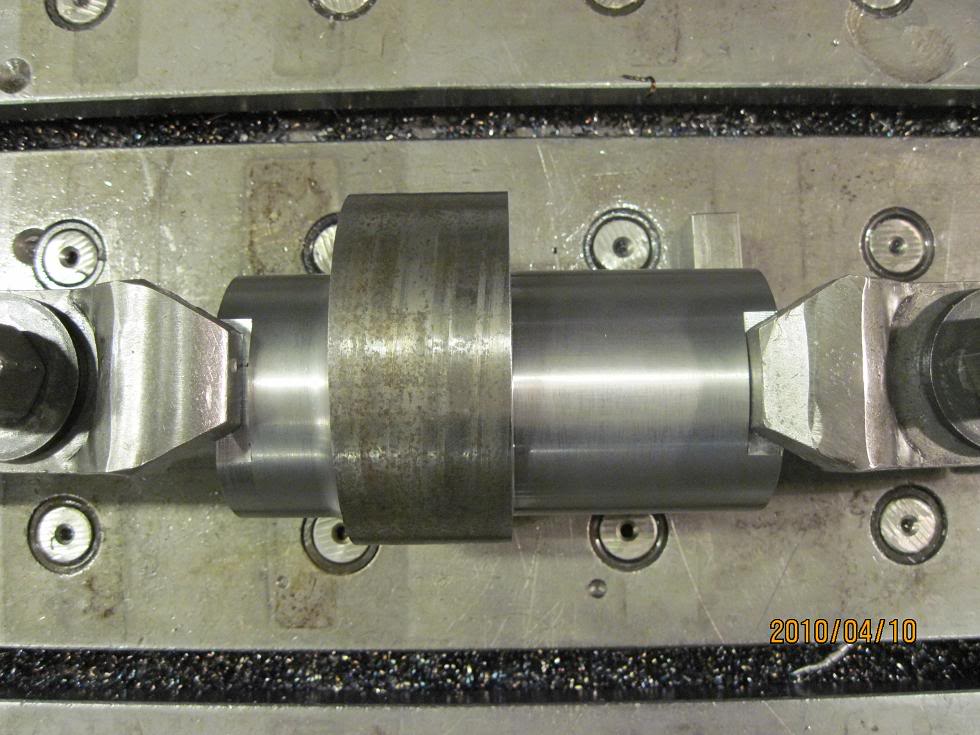
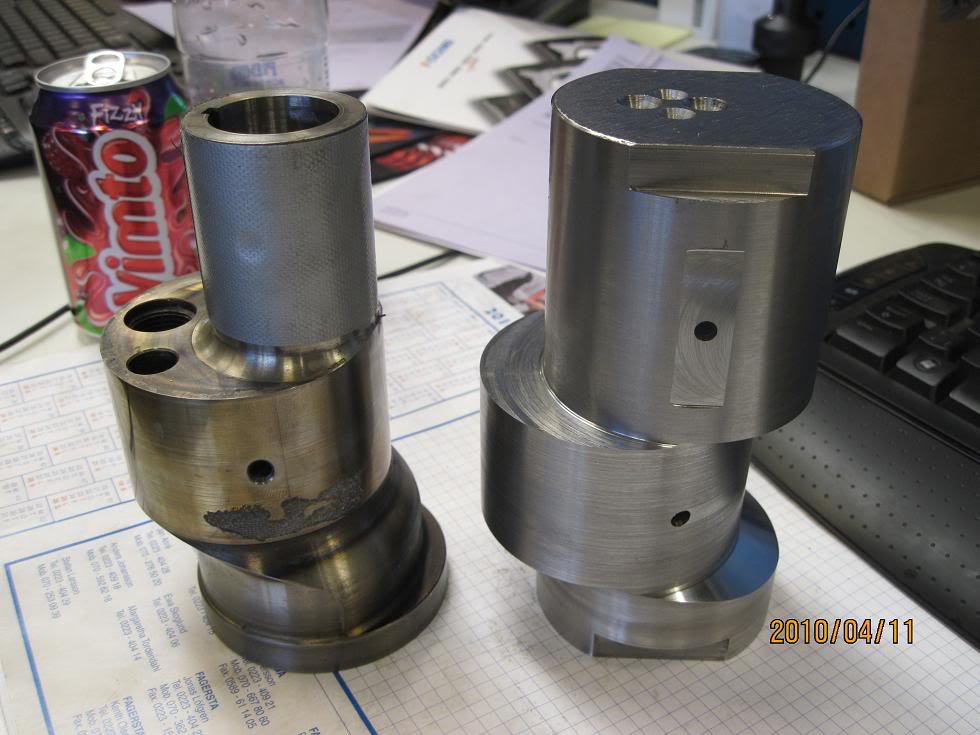
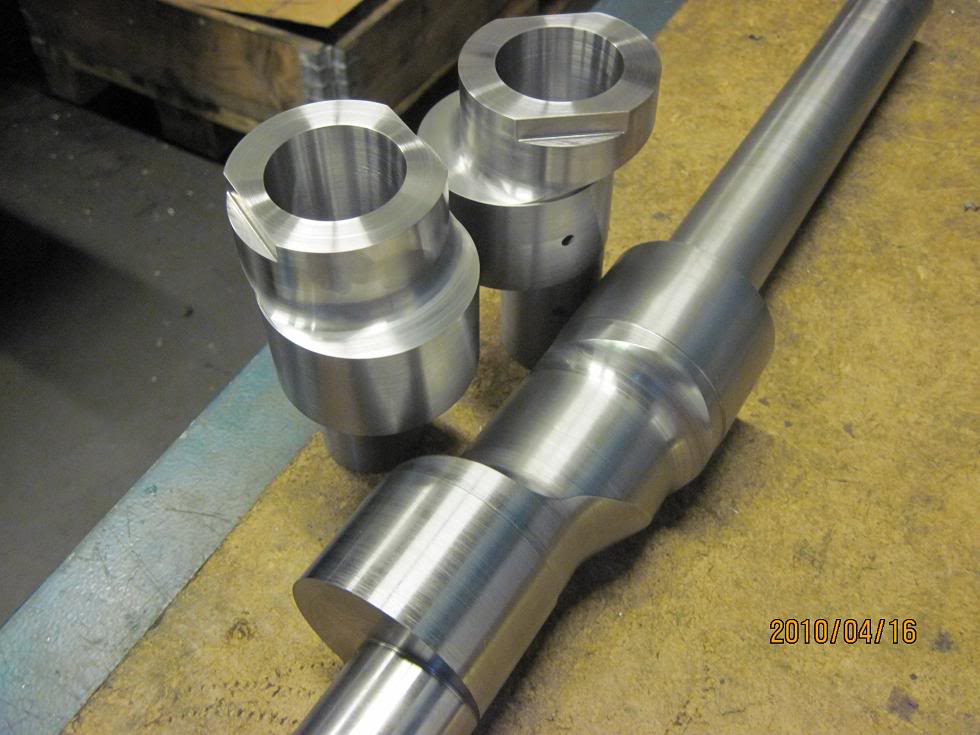
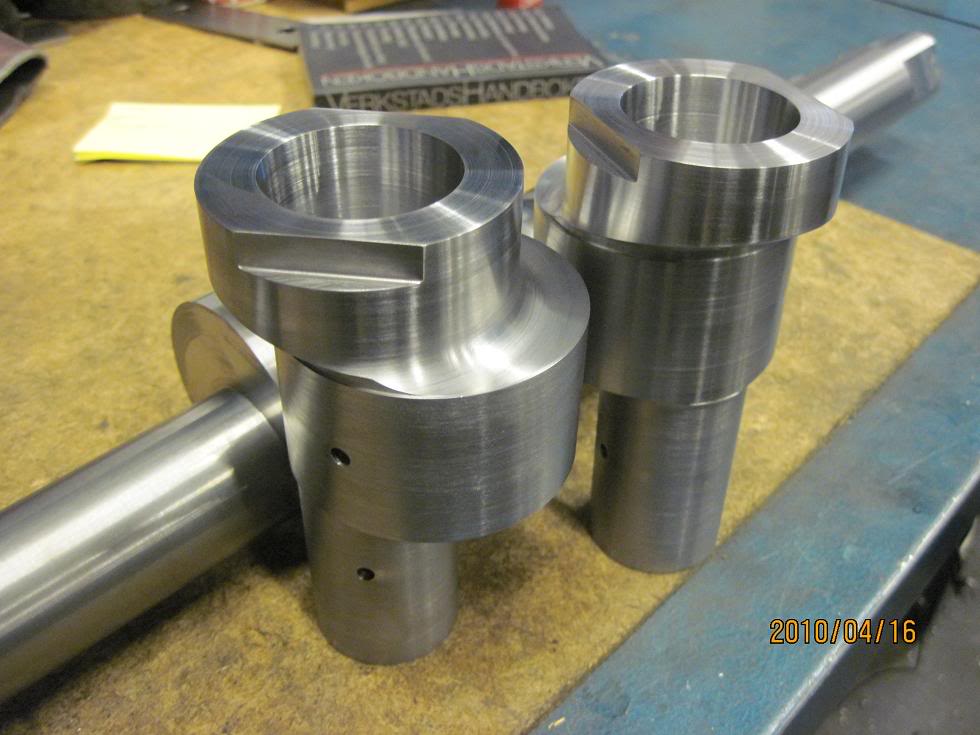
Have started on the big end's inside of the lose lobs. Sorry for my bad english, don't know realy what the name's are for things But you'll understand by the pictures I hope

As you can see they are about 10mm to long, just to keep the key-grip. With the keygrip I know where to put the holes and so on, without indicate on the lobe.


Name:  Wolvo142-26B-2010-04-16002-30.jpg
Views: 3337
Size:  67.2 KB


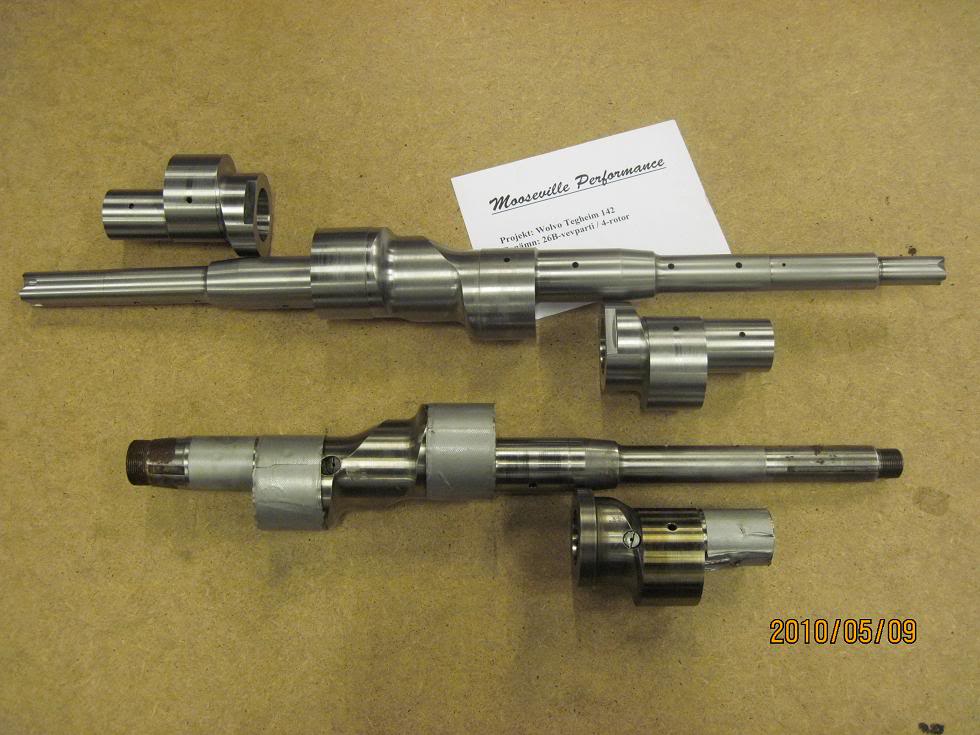
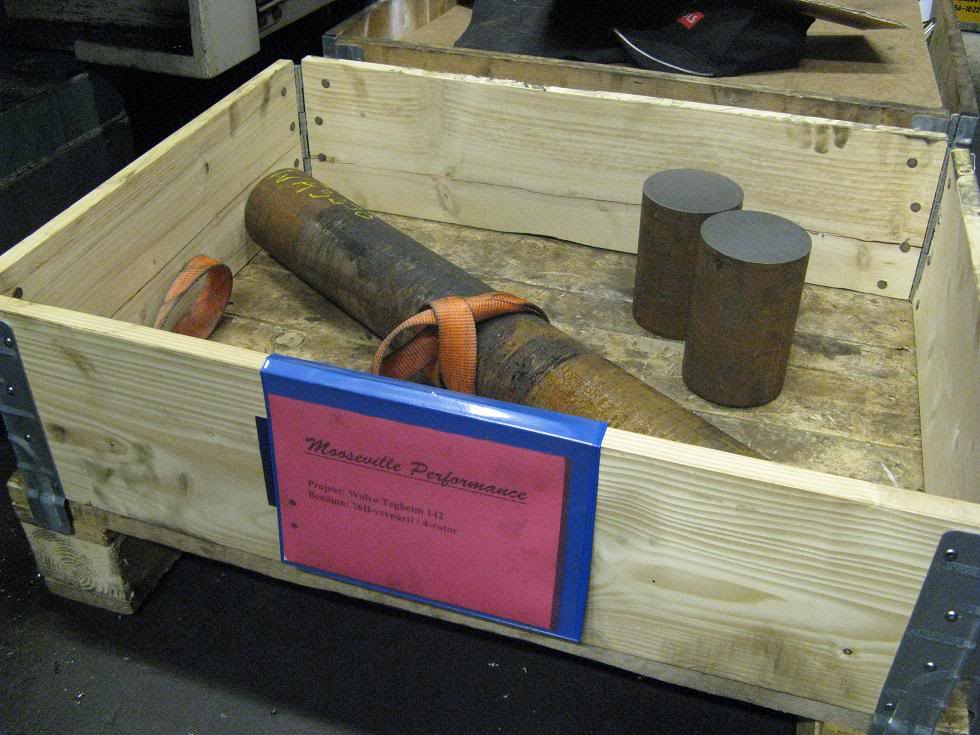
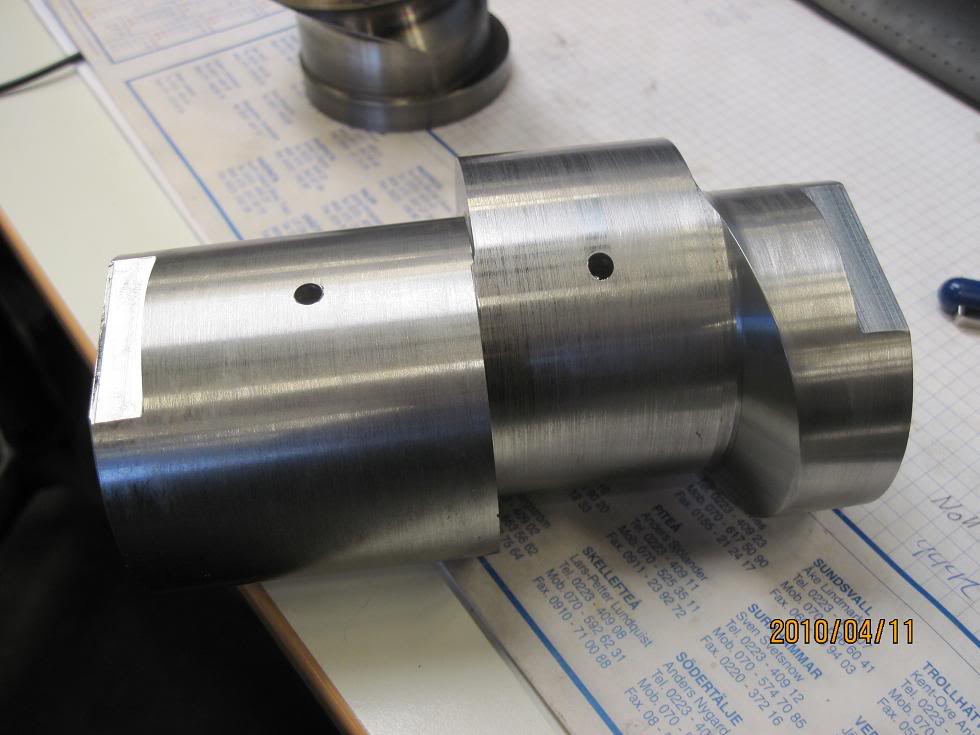
The two brothers wanted to pose beside their father


Name:  Wolvo142-26B-2010-04-16006-30.jpg
Views: 3402
Size:  86.8 KB

Name:  Wolvo142-26B-2010-04-16007-30.jpg
Views: 3399
Size:  78.3 KB


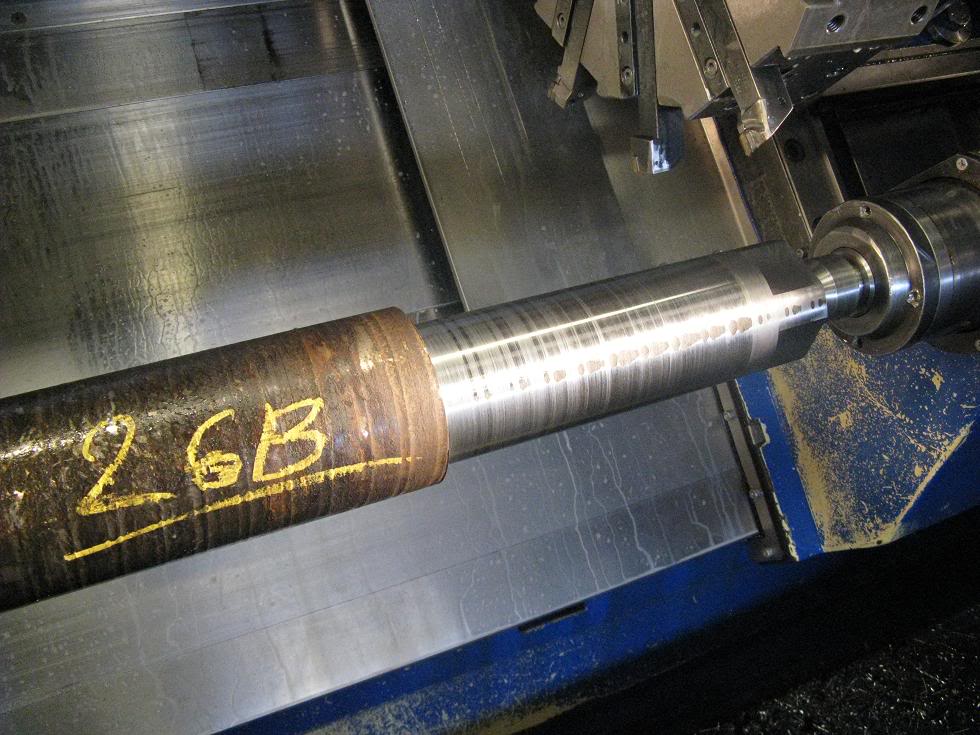
Tegheim 4Rotor vs. Mazda 20B


Name:  Wolvo142-26B-2010-04-16008-30.jpg
Views: 3629
Size:  80.4 KB

Name:  Wolvo142-26B-2010-04-16010-30.jpg
Views: 3436
Size:  83.6 KB
Old Oct 27, 2010 | 11:28 PM
  #9  
Tegheim's Avatar
Thread Starter
Senior Member
 
Joined: Sep 2003
Posts: 229
Default

Deep-drilling...

Name:  Wolvo142-26B-2010-04-24002-30.jpg
Views: 3337
Size:  104.2 KB


Usual drilling...

Name:  Wolvo142-26B-2010-005-05002-30.jpg
Views: 3343
Size:  101.9 KB

Name:  Wolvo142-26B-2010-005-05006-30.jpg
Views: 3299
Size:  81.3 KB

Name:  Wolvo142-26B-2010-005-05007-30.jpg
Views: 3337
Size:  104.0 KB

Name:  Wolvo142-26B-2010-005-05008-30.jpg
Views: 3311
Size:  85.9 KB


Starting on the balance-holes...

Name:  Wolvo142-26B-2010-05-08001-30.jpg
Views: 3390
Size:  81.4 KB


Finally the holes are done!

2pc of 12mm holes, and 1 M18x1.5


Name:  Wolvo142-26B-2010-05-09005-30.jpg
Views: 3331
Size:  72.6 KB
Old Oct 27, 2010 | 11:29 PM
  #10  
Tegheim's Avatar
Thread Starter
Senior Member
 
Joined: Sep 2003
Posts: 229
Default

Only M24x1.5 in the front, and splines for the counterweight in the back, then ready for grinding!


Name:  Wolvo142-26B-2010-05-09014-30.jpg
Views: 3355
Size:  81.9 KB

Name:  Wolvo142-26B-2010-05-09012-30.jpg
Views: 3314
Size:  74.3 KB

Name:  Wolvo142-26B-2010-05-09015-30.jpg
Views: 3581
Size:  117.4 KB

Name:  Wolvo142-26B-2010-05-09017-30.jpg
Views: 3401
Size:  103.2 KB

Name:  Wolvo142-26B-2010-05-09020-30.jpg
Views: 3815
Size:  95.8 KB


All times are GMT -5. The time now is 06:59 PM.