4 Rotor Build
 10-19-2011, 06:42 PM
#11
Member
Thread Starter

Join Date: Oct 2010
Location: Netherlands
Posts: 34
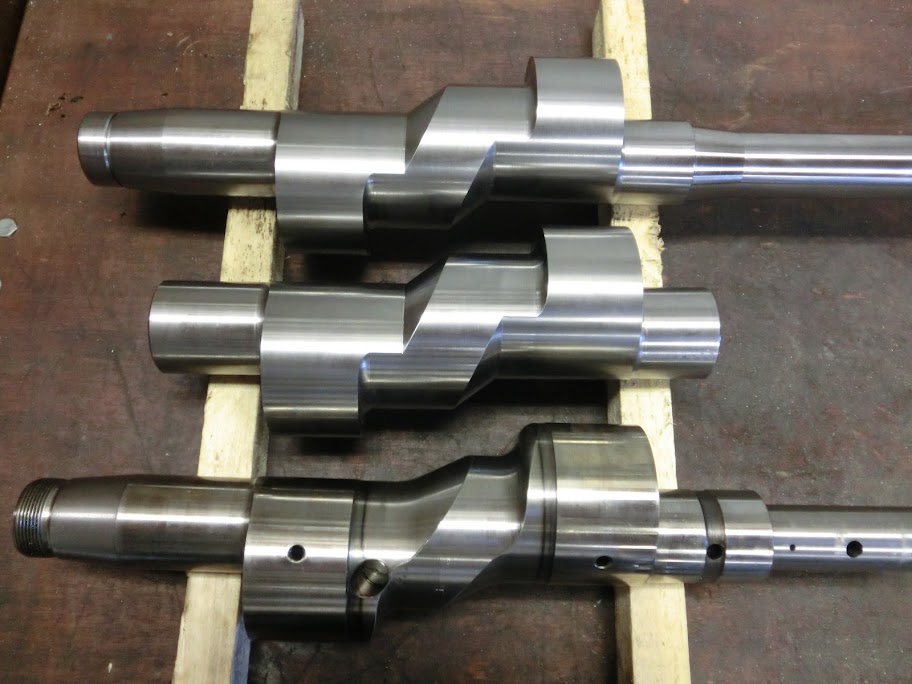
I started on the parts I need to mount the e-shaft eccentrically in the lathe today.
Hope to get those done and get some more progress done on the e-shaft next weekend.
Would be nice if I can get those bits heat treated soon.
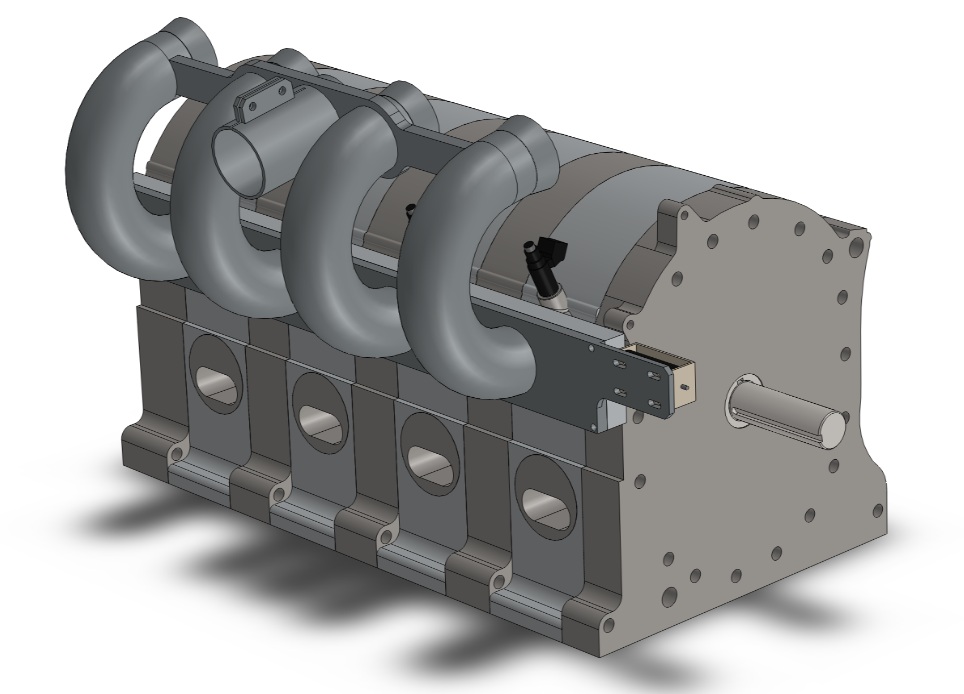
Also started on some intake manifold designing. I got some idea's I wanted to check out, so I started modelling everything.
This isn't the entire intake system yet, I'll update this later.
Hope to get those done and get some more progress done on the e-shaft next weekend.
Would be nice if I can get those bits heat treated soon.
Also started on some intake manifold designing. I got some idea's I wanted to check out, so I started modelling everything.
This isn't the entire intake system yet, I'll update this later.
 10-19-2011, 10:48 PM
#12
Member

Join Date: Sep 2007
Location: Indianapolis
Posts: 60
The exhaust inserts are great! It should be fun to see how the final transitions out of the port and into the header turns out, going from oval to round. Want to make me some of those exhaust inserts for Christmas 
10-20-2011, 06:27 AM
#13
Senior Member

Join Date: Sep 2005
Location: Wayne NJ
Posts: 1,440
i meant both you and john. it is very nice of you guys to show the design and technology, used to make this. its not like everyones doing this stuff... i for one have never seen most of this stuff thank you guys
10-20-2011, 10:23 AM
#14
Member
Thread Starter
Join Date: Oct 2010
Location: Netherlands
Posts: 34
I'm sorry, I don't fabricate parts for others, I'm not a company or anything, just a hobbyist. Even if I made some inserts for you, making the inserts is a piece of cake, placing them in the housings isn't. The original channel is milled out, the shape of the new insert is milled out, so that it's a light pressfit, then the inserts were smeared with defcon and pressed in, then the stainless steel insert was very lightly tig welded to the housing liner, then everything was beveled, and after that was done I smoothed out the waterjacket using defcon. I'll see if I can post up a more detailed picture of the waterjackets. There is a lot more coolant flow area in the waterjacket than stock, this is also because of the length of the 4-rotor (I'm planning on a normal cooling system which enters and exits at the front of the engine), more area here means the water will cool down more slowly, I wouldn't do this on a regular 2-rotor.
No problem, I've gotten a lot of usefull information and idea's from these forums, and I like reading about these sorts of builds, so least I can do is return the favour.
10-20-2011, 08:10 PM
#15
Member
Join Date: Sep 2007
Location: Indianapolis
Posts: 60
Do you mind sharing your Solidworks files? I have a model that I dont think is quite accurate. I am trying to trace out different peripheral port timings relative to the housing/iron so I can just print out 17"x11"s and lay them between the iron and housing. If you are willing, please email them to adshain@indiana.edu
Thanks!
Thanks!
10-21-2011, 03:31 PM
#16
Member
Thread Starter
Join Date: Oct 2010
Location: Netherlands
Posts: 34
Well, I'm not going to hand out these cad files to everyone, because a lot of work and time went into them.
I can help you out with your port-timing though.
I've added a few solidworks files that can do what you want. It's not a complete engine in CAD, but it does what you want it to do. You set the eccentric shaft at the angle you want, and then you can either print it out on a 1:1 scale, or you can do like I did, measure the distance between the port and the flat bottom side of the housing, and use that dimension in the milling machine. You need the latest version of solidworks to open it, since that's the version I'm using.
10-22-2011, 04:45 PM
#17
Member
Thread Starter
Join Date: Oct 2010
Location: Netherlands
Posts: 34
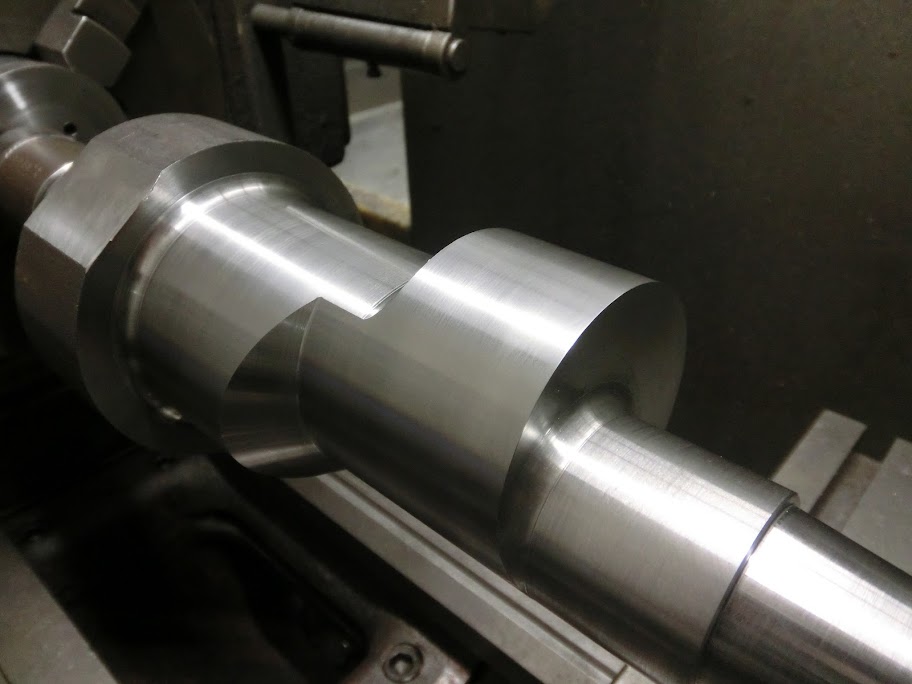
I made the jig's to position the eccentric shaft in the lathe today, which was a crappy job to do. The parts have to be really accurate, or else the stroke of the shaft or the 90� phasing will be off. I spend a lot of time making sure everything in order. After that was done I could start turning the eccentric bearing surfaces. I only had time left to do one, I'll machine some more tomorrow.
One eccentric shaft end goes here
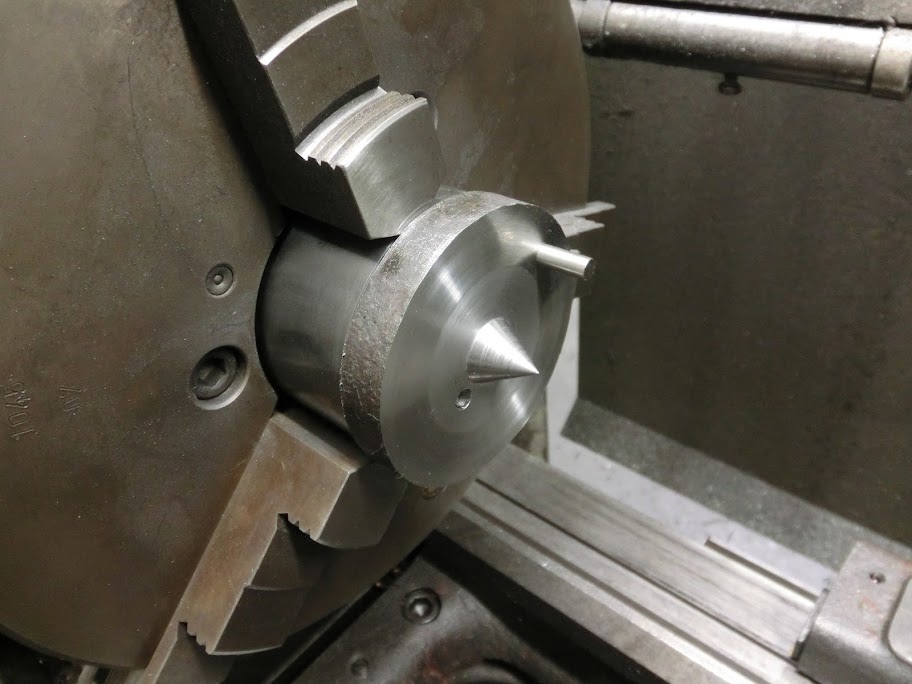
Finally it's in

Came out allright
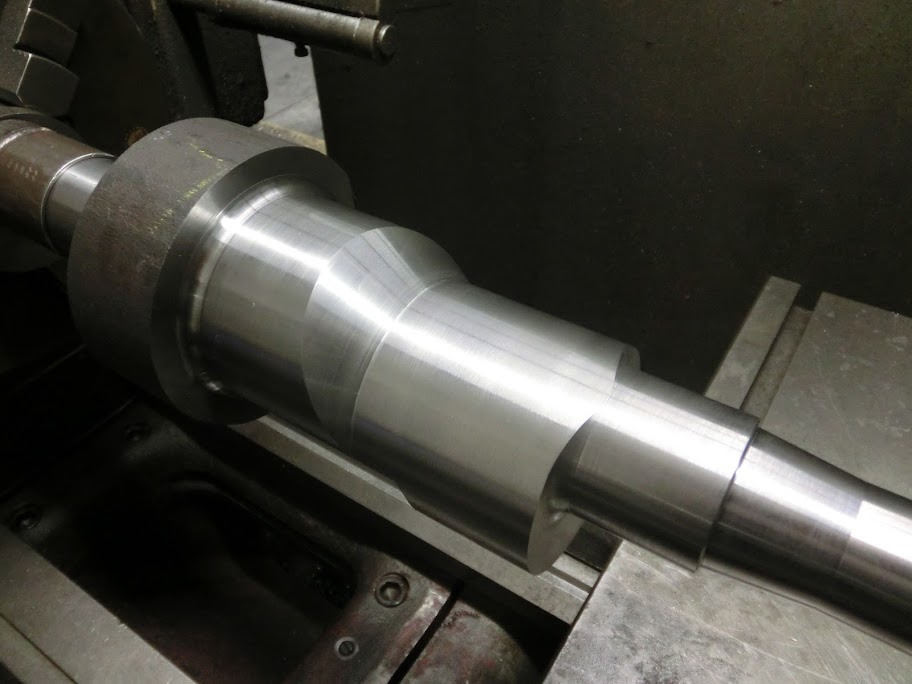
Short clip of the machining work
http://www.youtube.com/watch?v=UDCborFfCmU
One eccentric shaft end goes here
Finally it's in
Came out allright
Short clip of the machining work
http://www.youtube.com/watch?v=UDCborFfCmU